After I arrived back in the States in late February, I already knew what my next adventure was going to be. I wanted to follow in the footsteps of some of my favorite authors and thinkers and spend some time alone in the woods. After rereading Henry David Thoreau’s Walden, I resolved to construct a small shack in the woods on some family land about a forty-minute walk from my home.
Construction started on the 1st of March and lasted until the middle of April, when I was finally able to move into my shack, where I spent the next five weeks living alone. Part of this journey involved taking a break from the digital world. As a result, I took a break from blogging and embraced writing with a typewriter. Now that I’ve made it out of the woods (at least literally), I want to share some of the experiences I have had in nature. However, before I get into my time living there, I need to first explain the construction process of my little camp.
The Shack
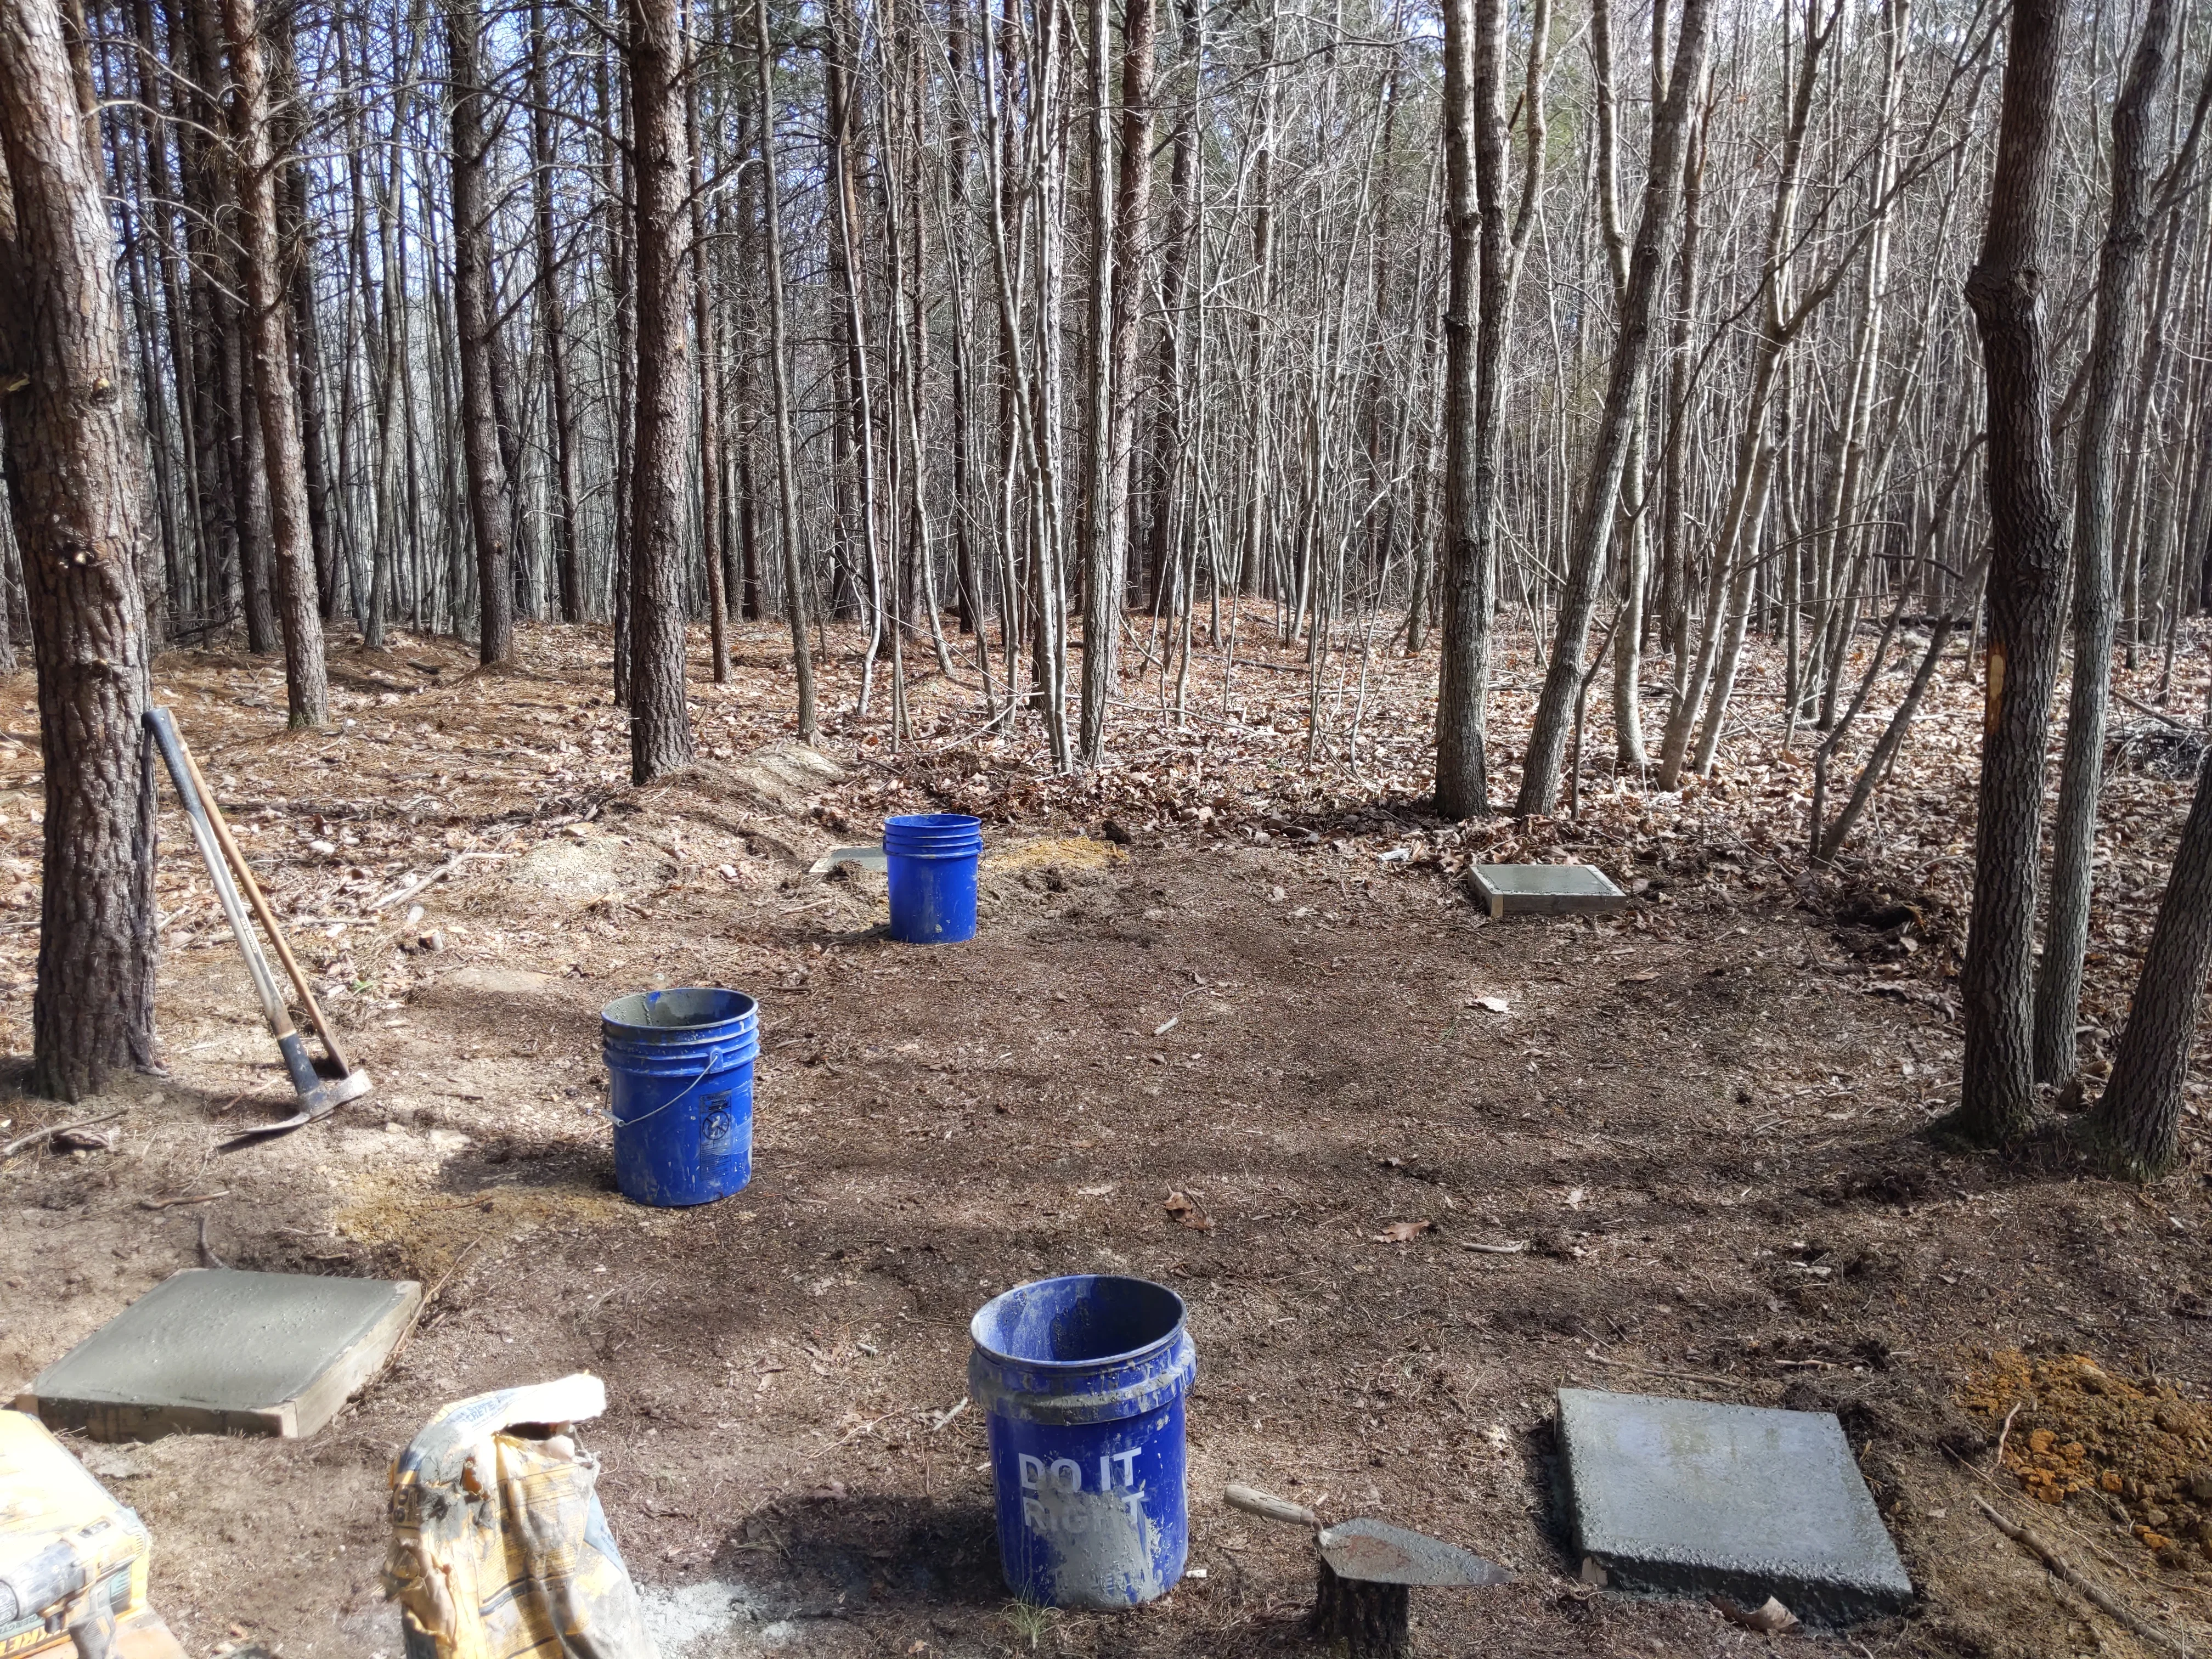
Building the shack, unsurprisingly, took the largest amount of effort and was built over the course of about a month. The first step was clearing a plot to construct the foundation. After a few days of trimming branches, downing trees, and raking dirt, I developed a nice little plot where I poured four concrete cornerstones.
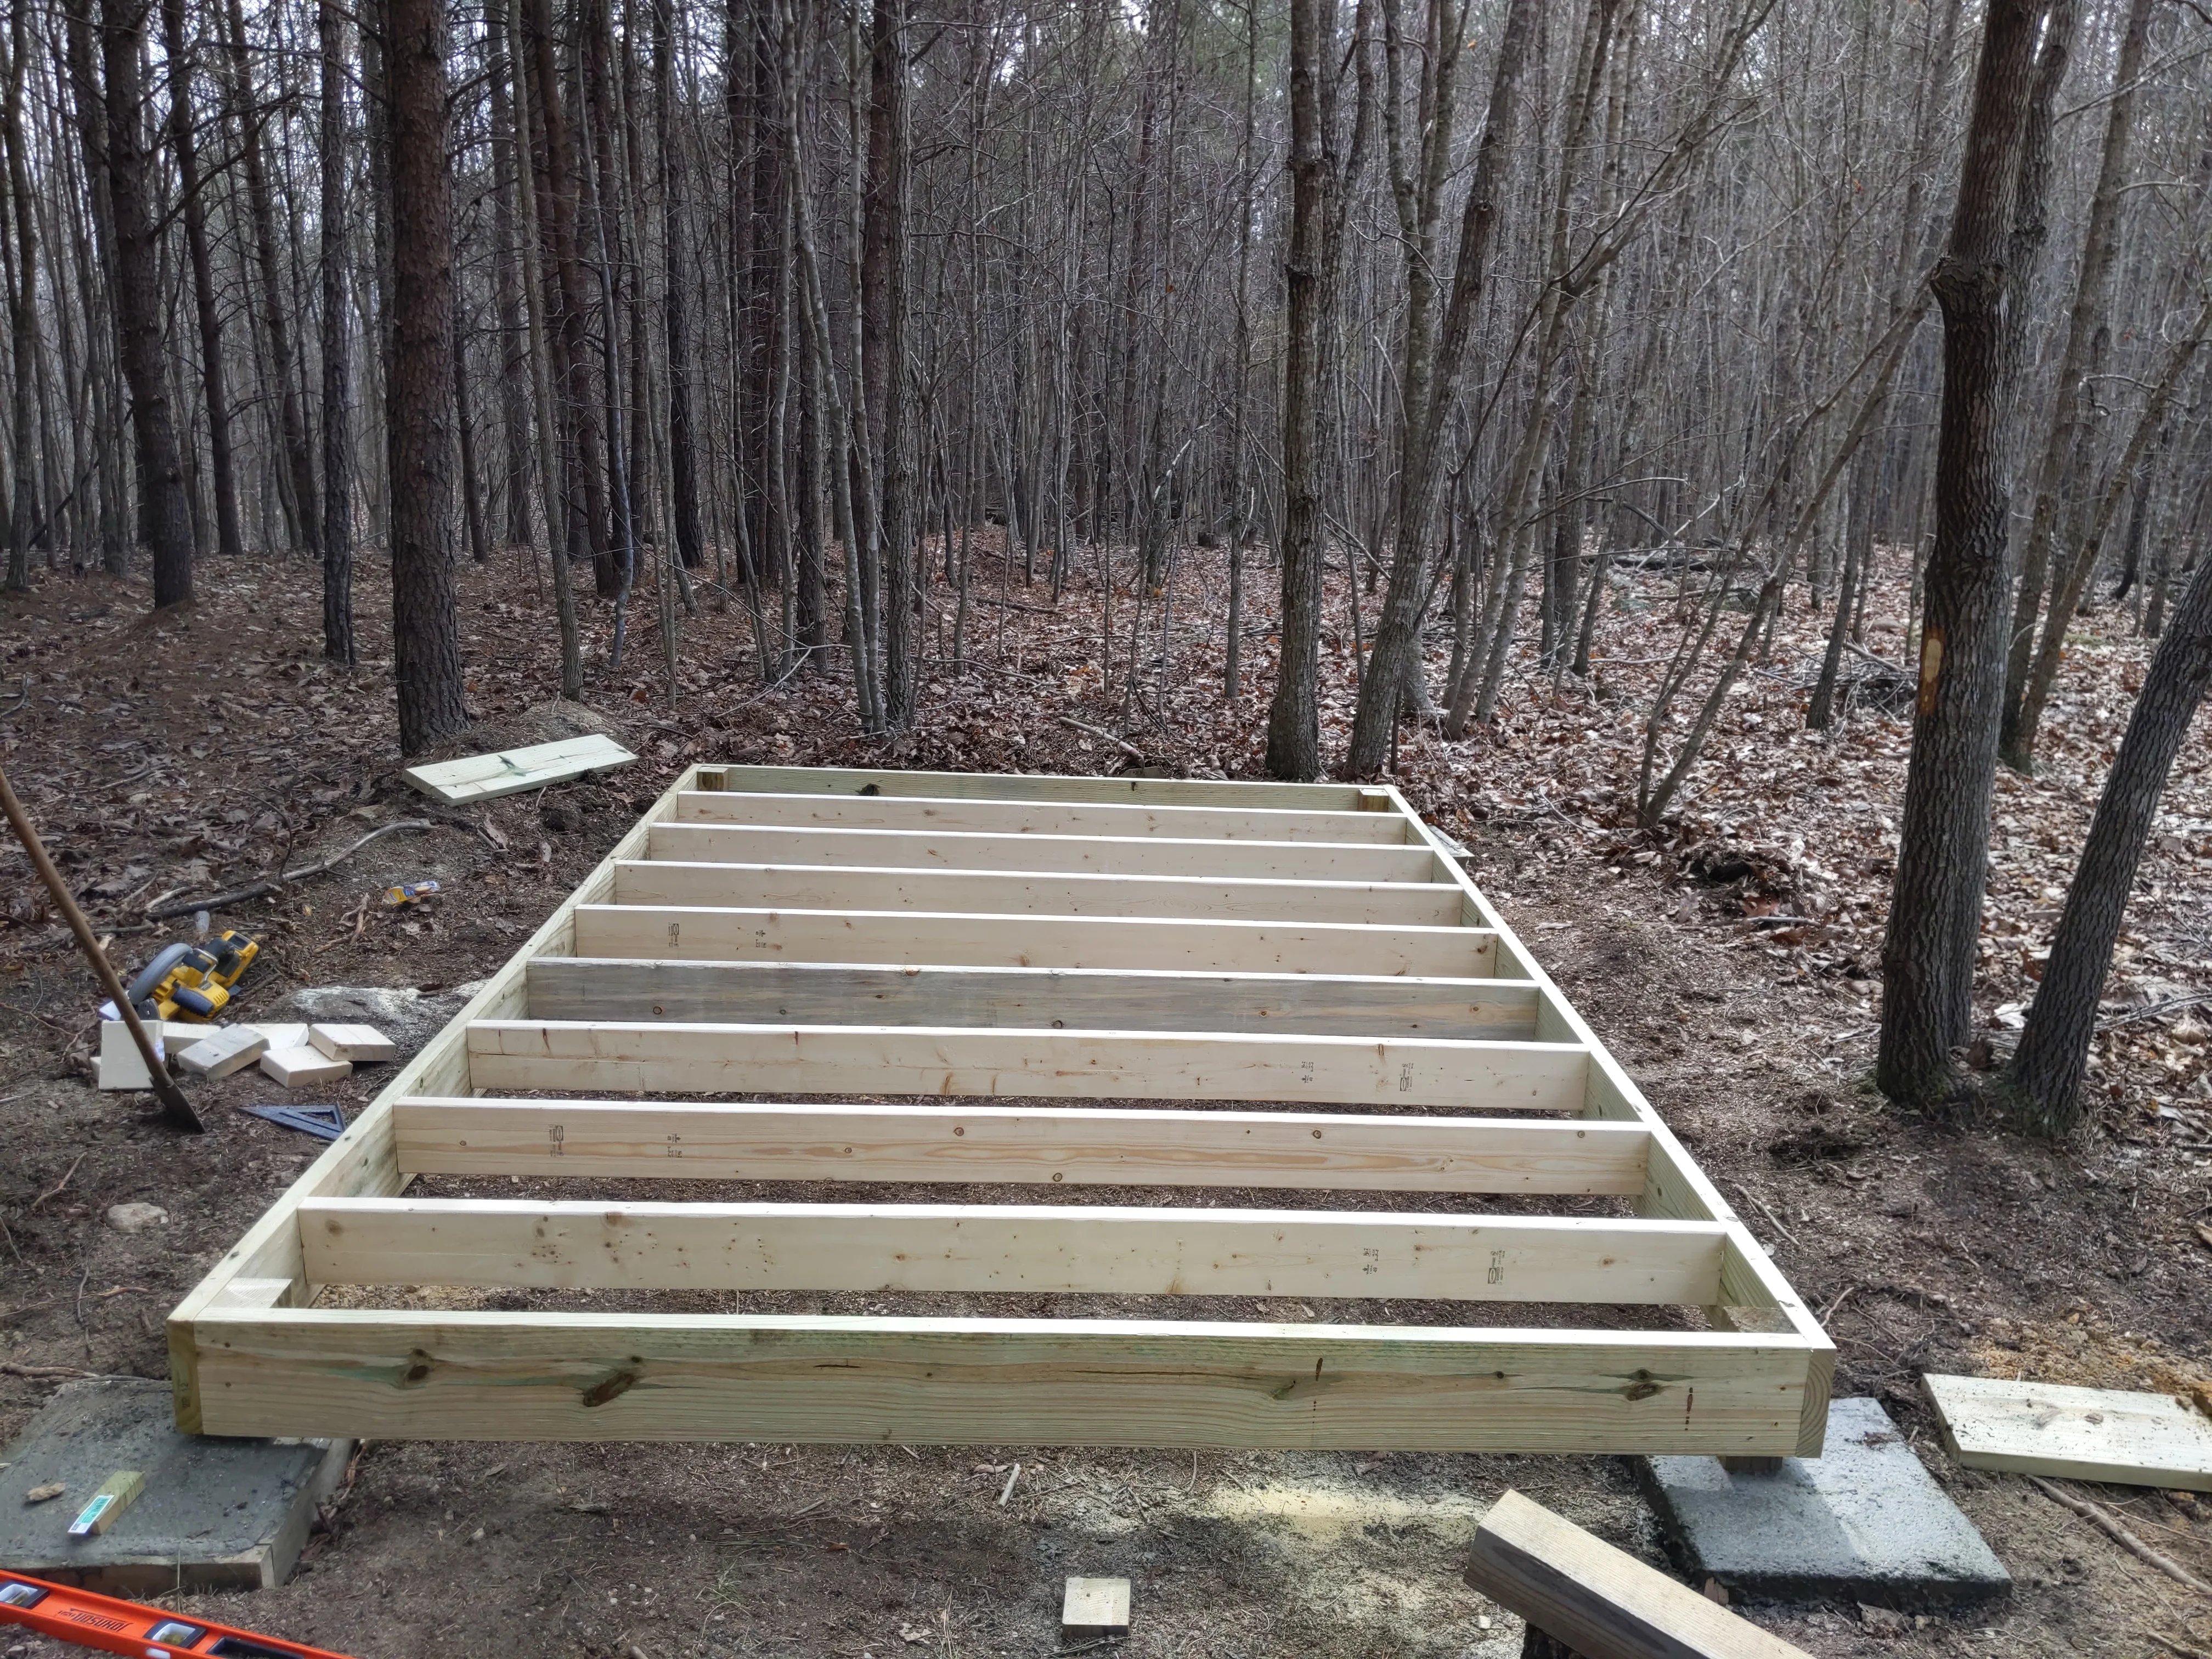
After the concrete set, an eight-by-twelve-foot subfloor was constructed. This was then topped with six sheets of OSB plyboard (three across, two thick).
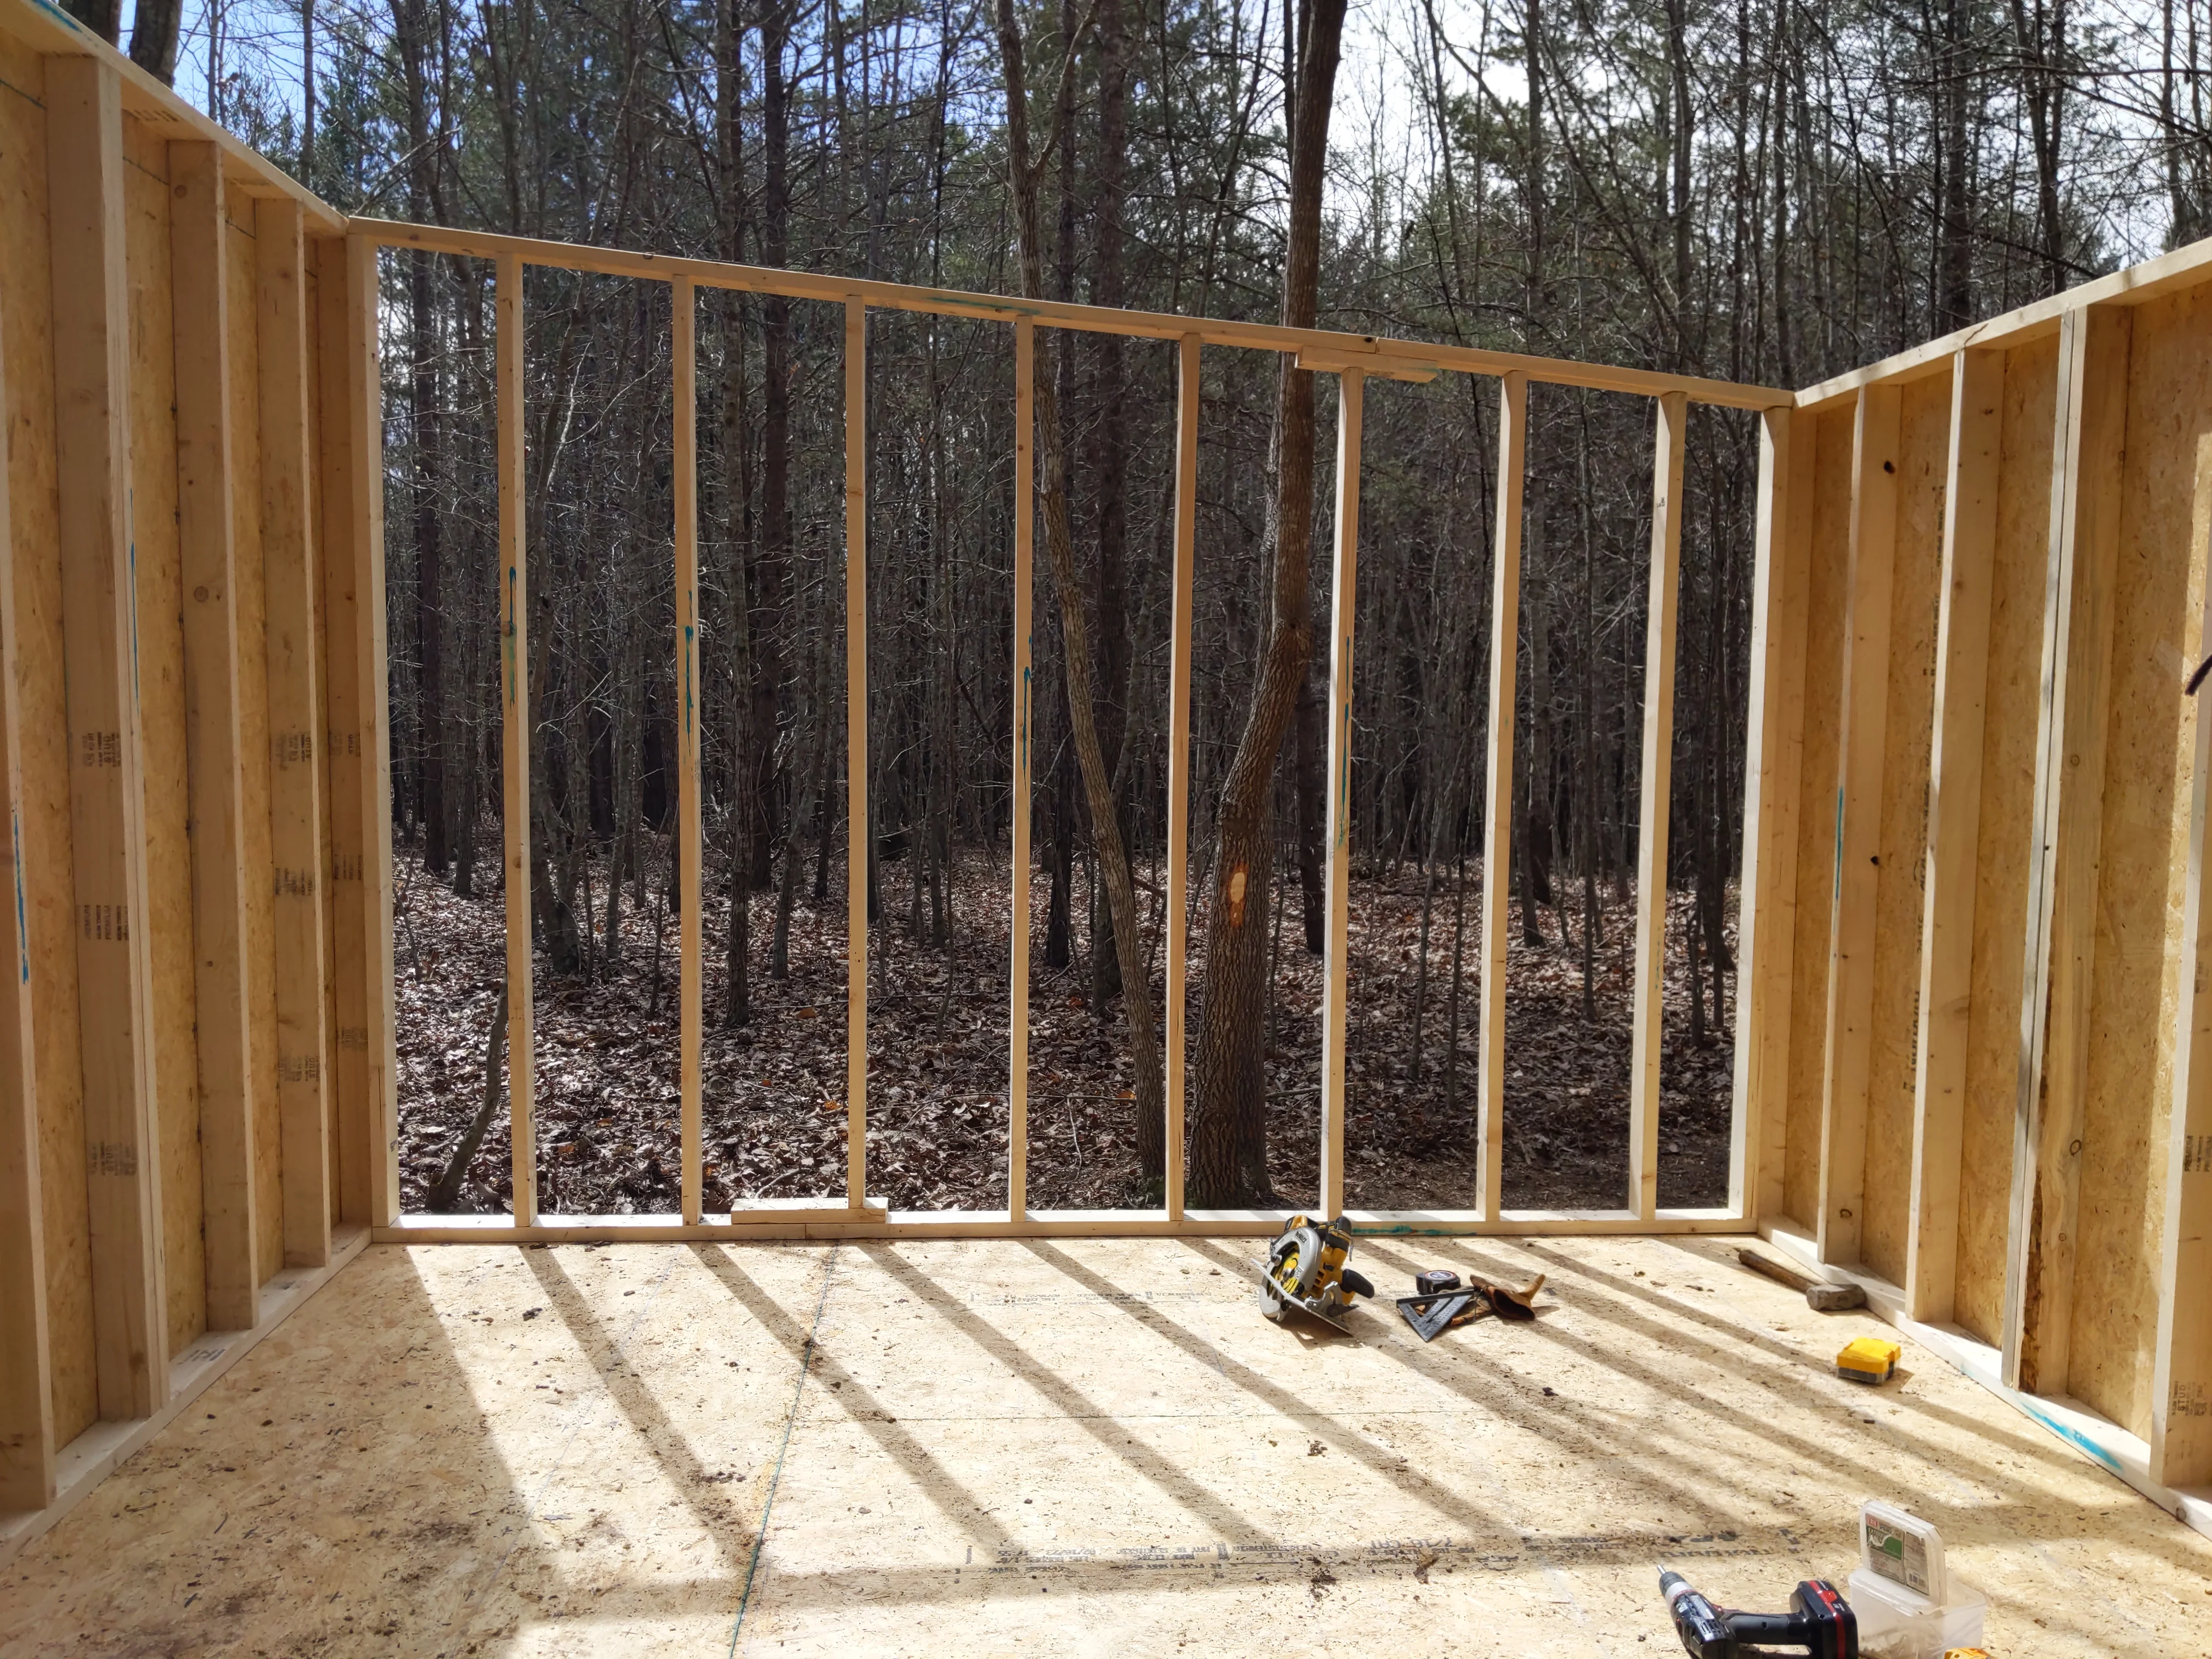
The walls were then framed and raised to be eight-feet tall on one end of the building and seven feet tall on the other.
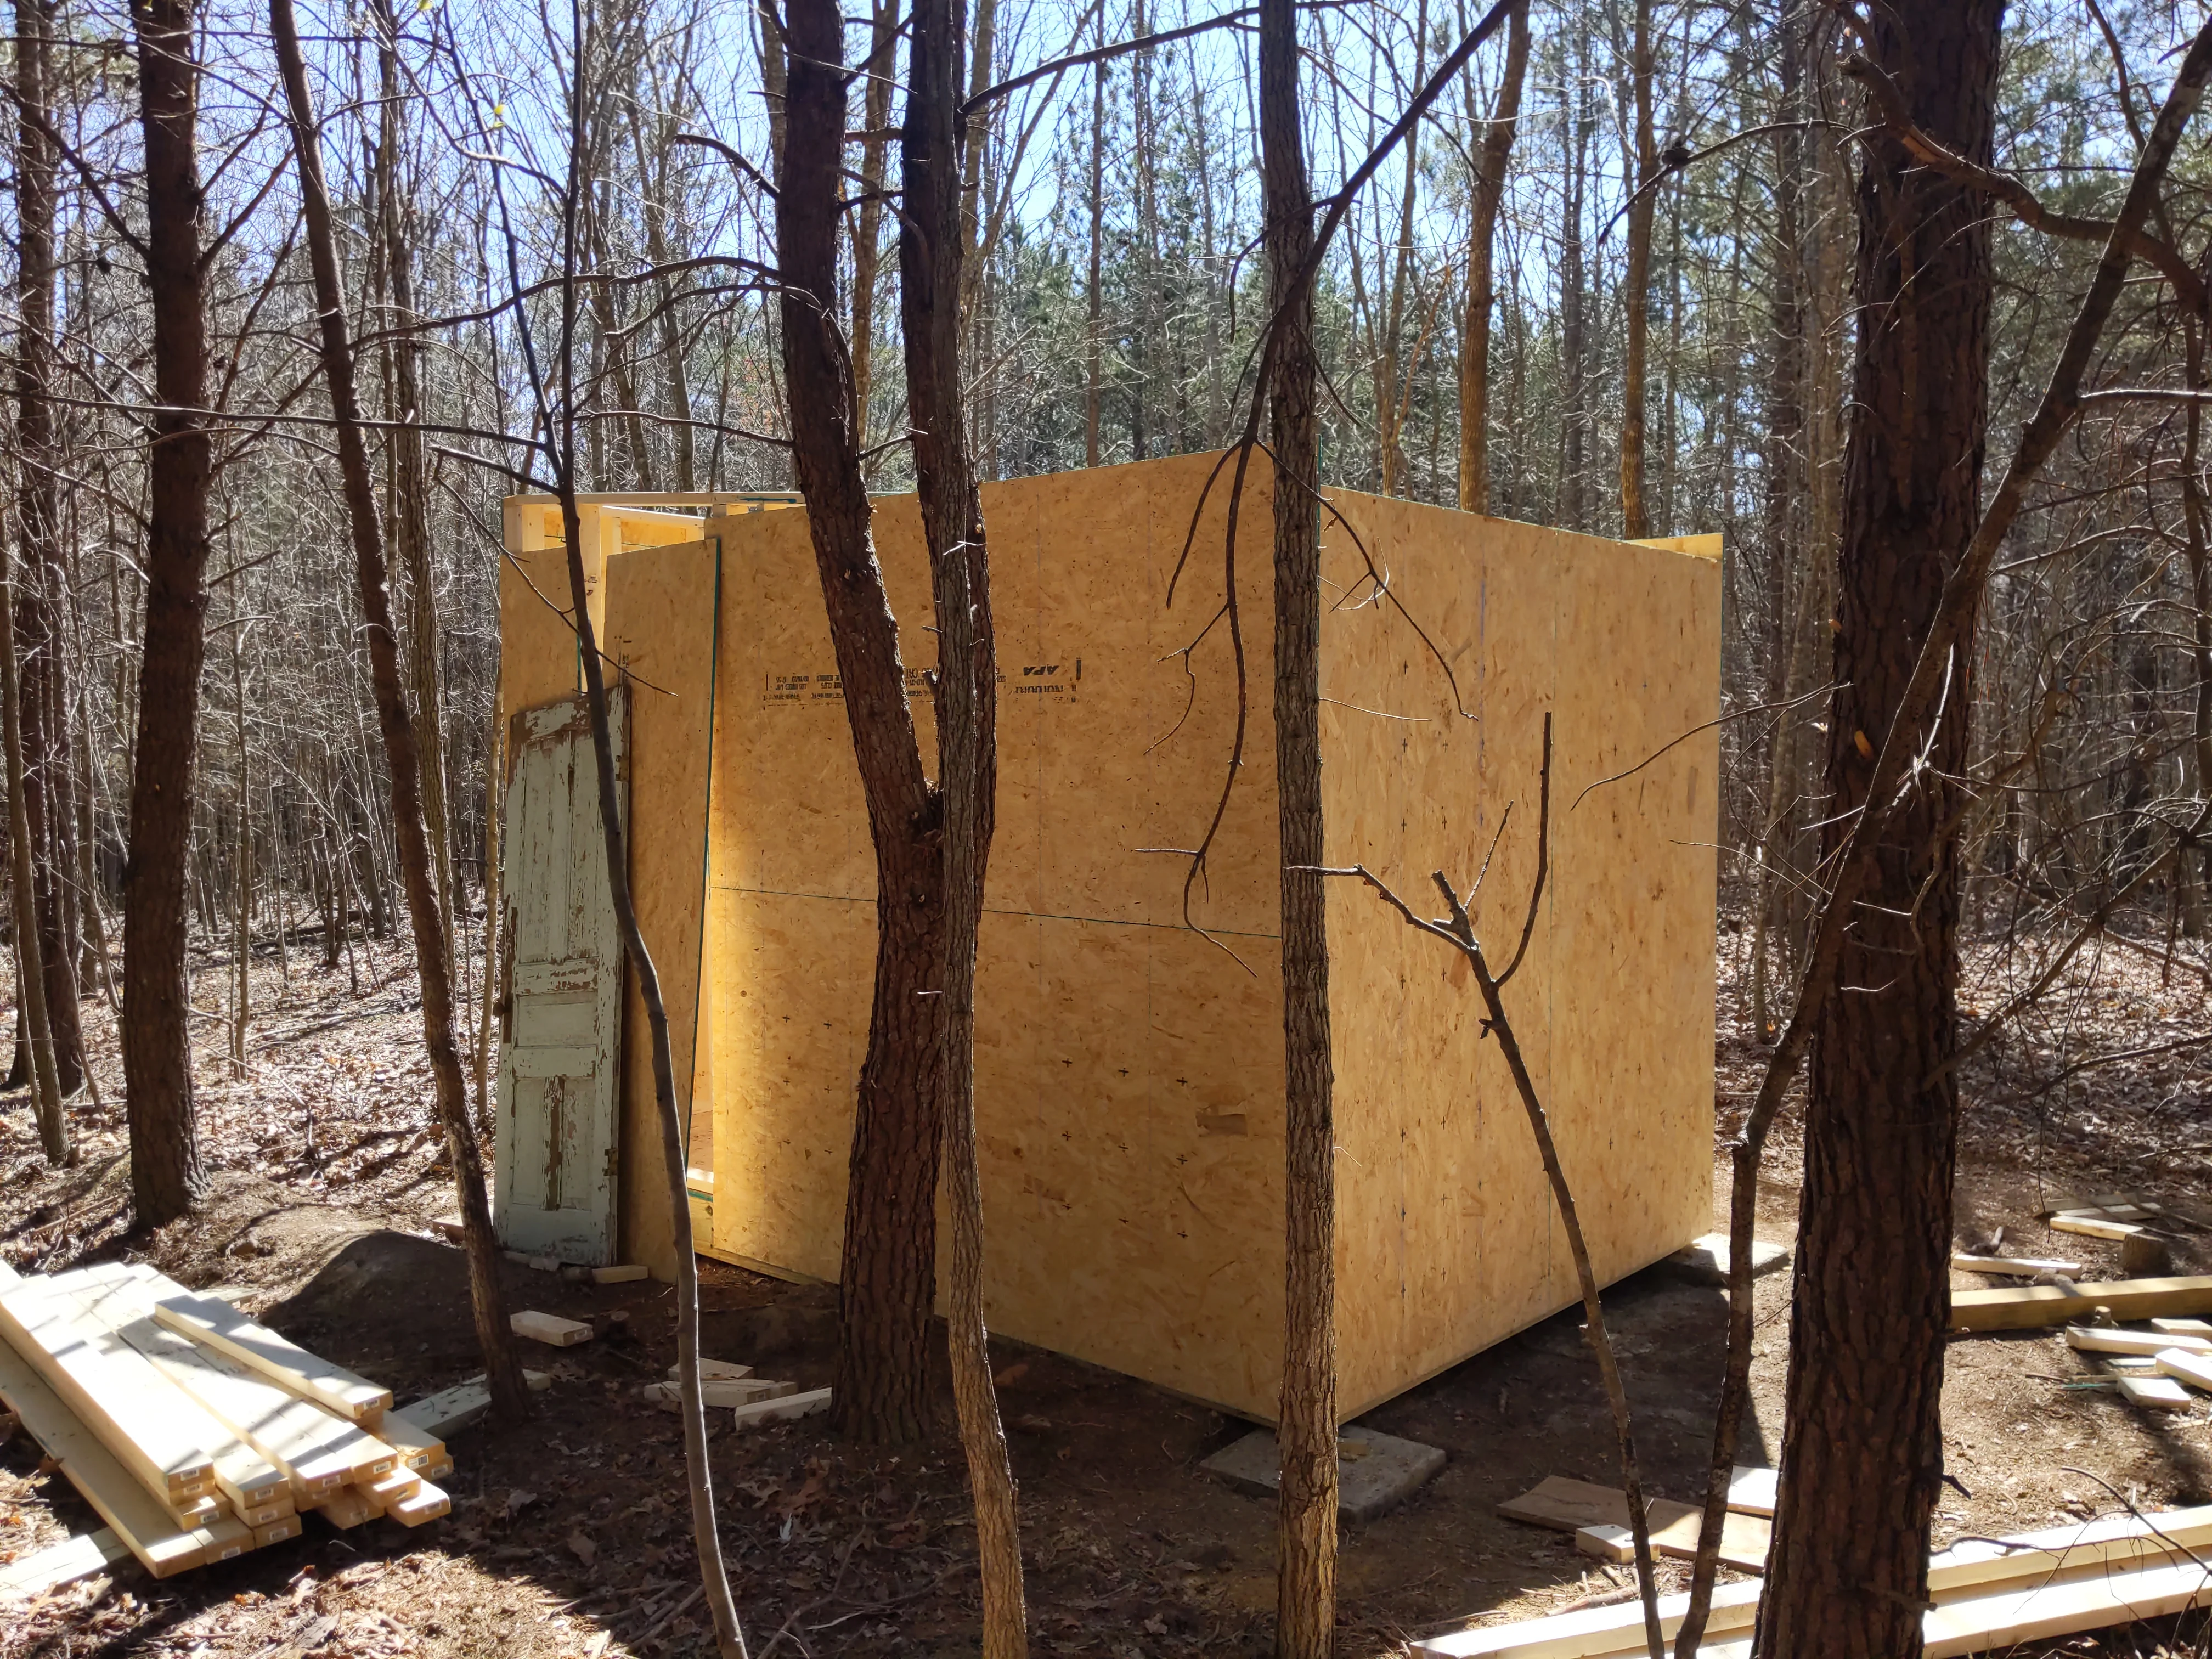
Next, the door and windows were framed, and plywood was fastened to the outside walls.
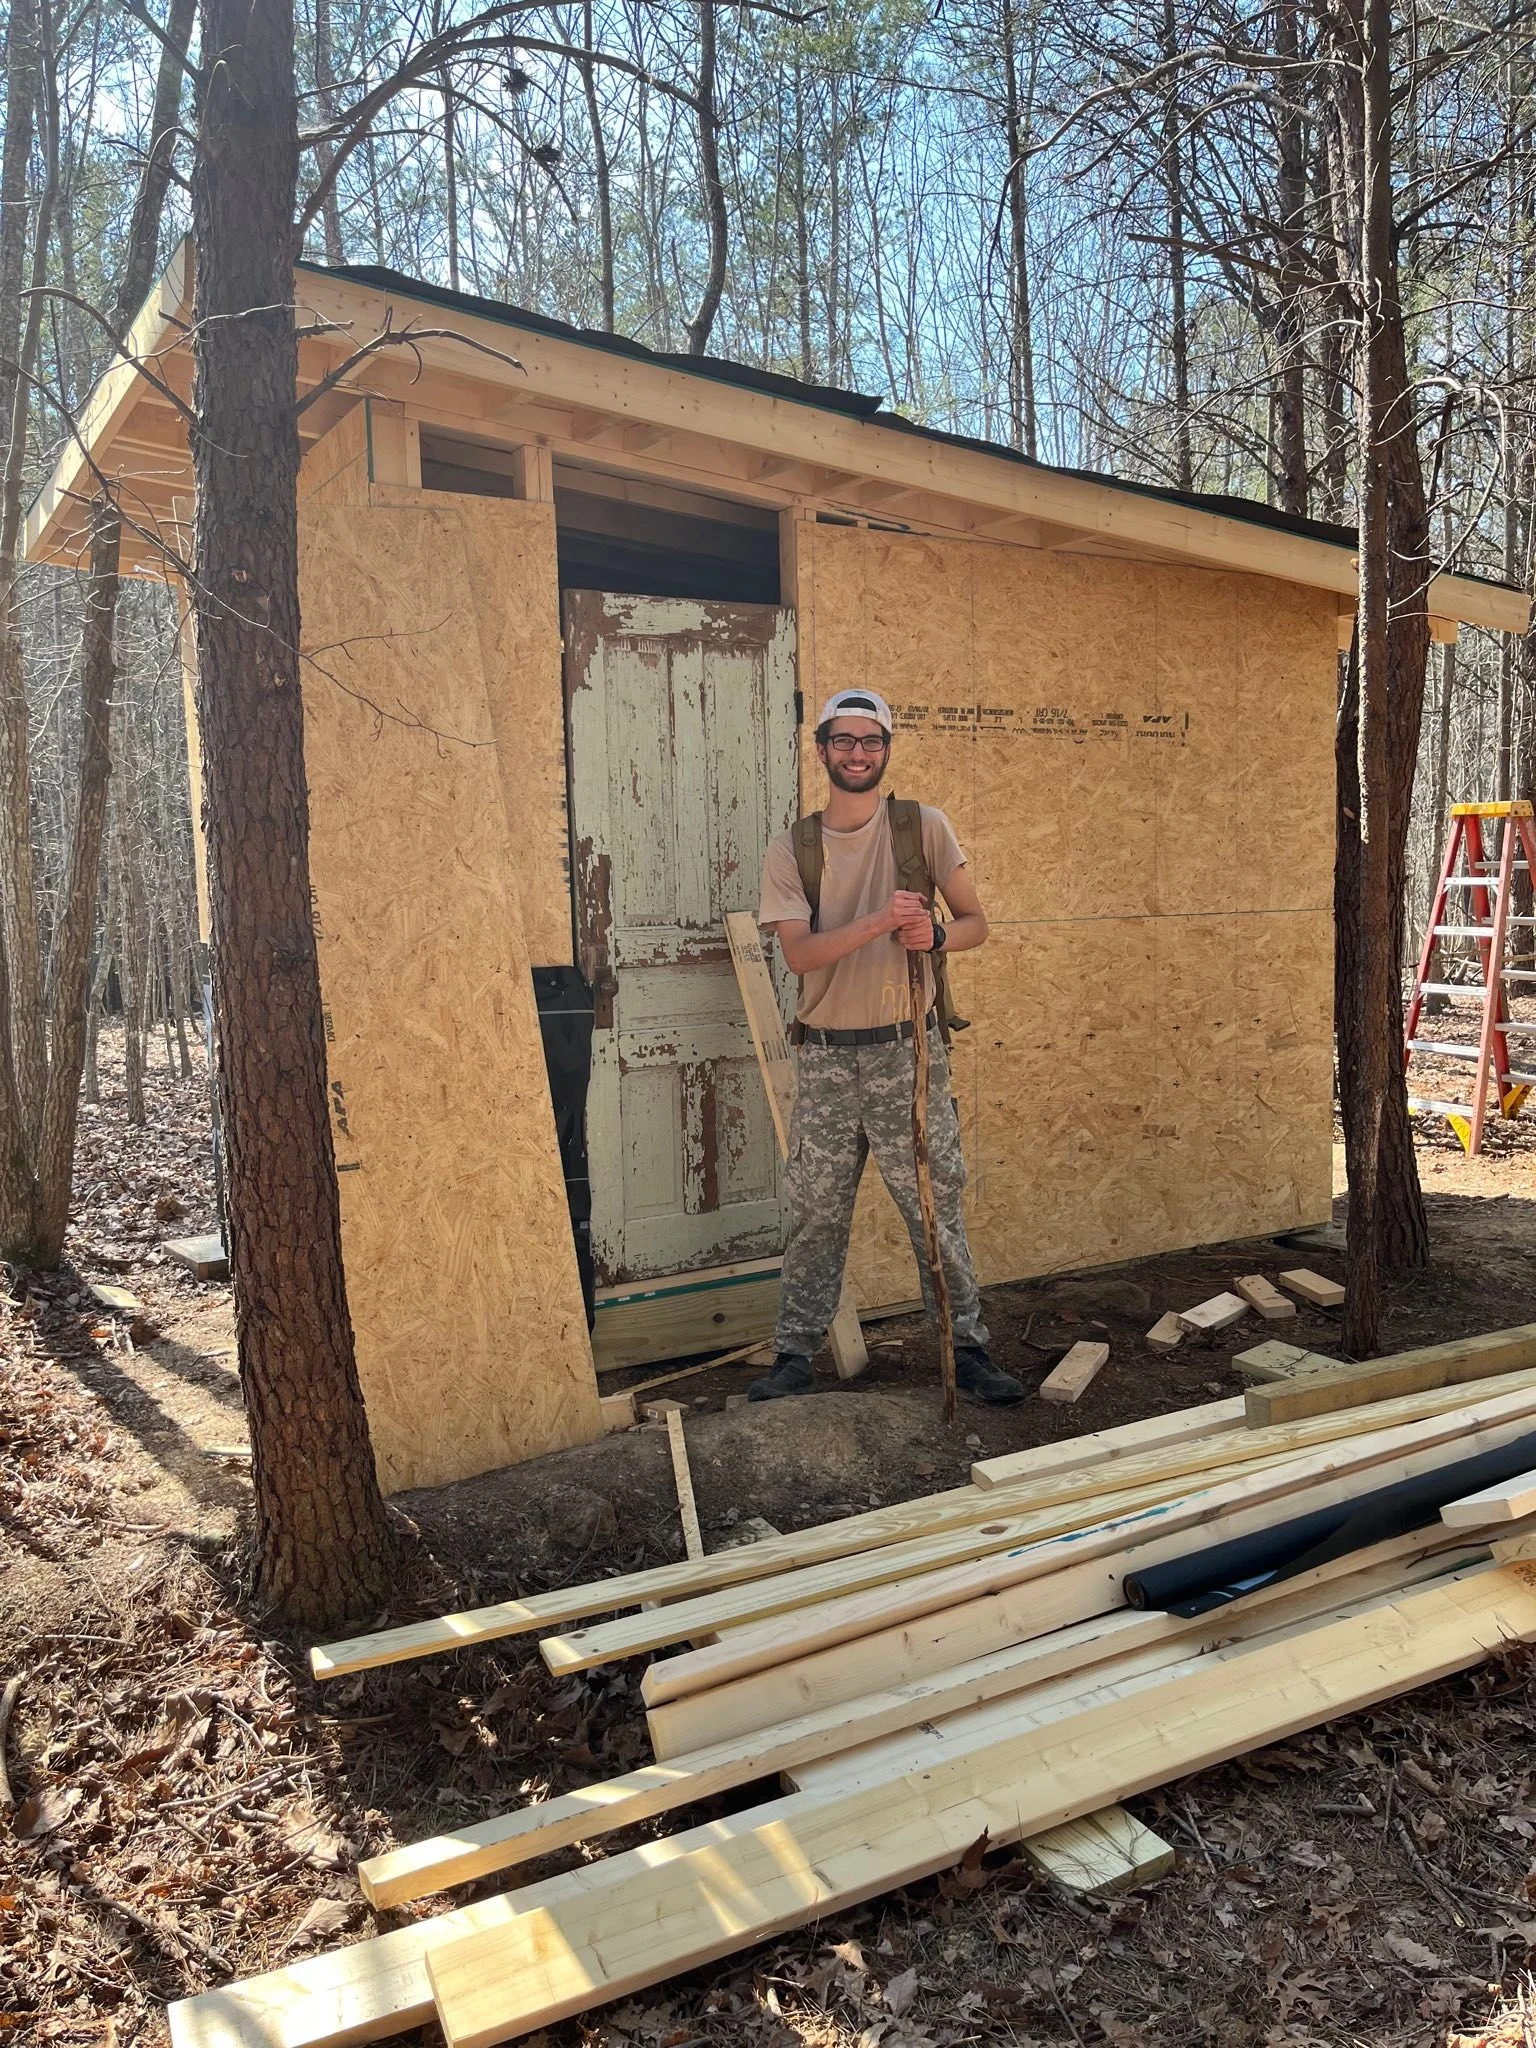
Rafters were then constructed, and plywood was once again used for the roof, which was topped with tar paper. The door and windows were also installed.
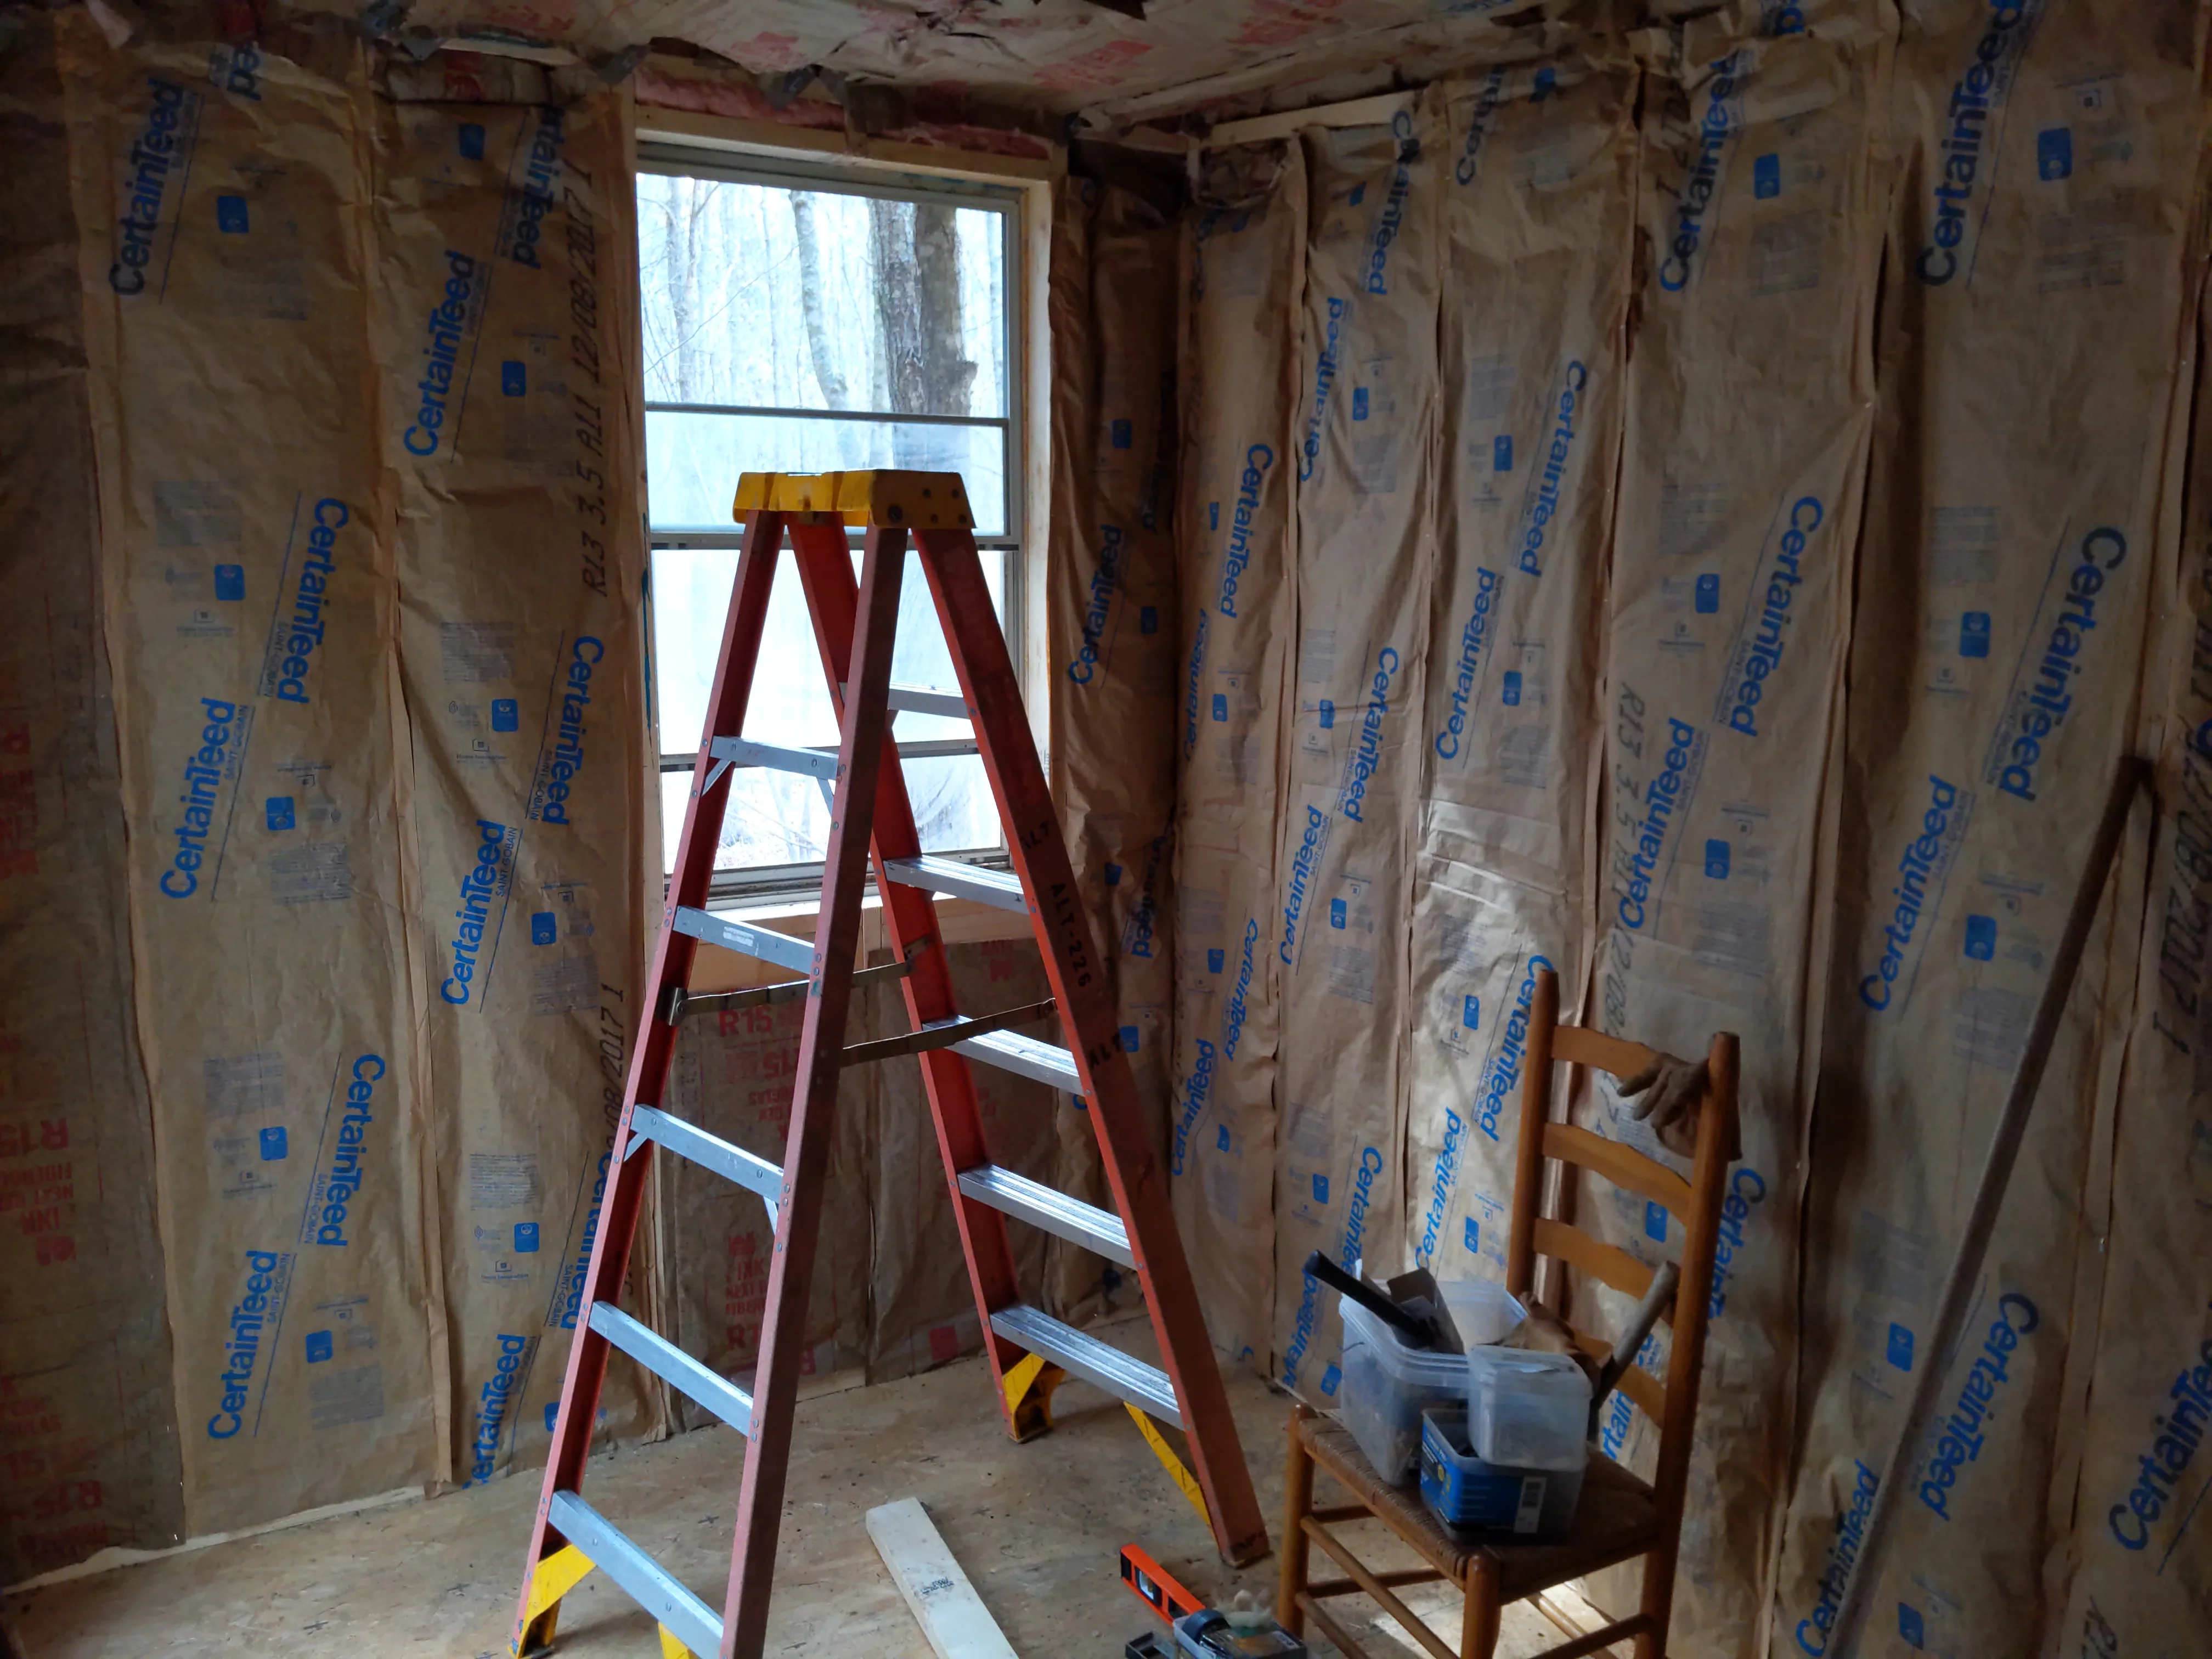
The holes in the walls were then patched, and insulation was placed inside the walls and ceiling before being covered once again in plyboard.
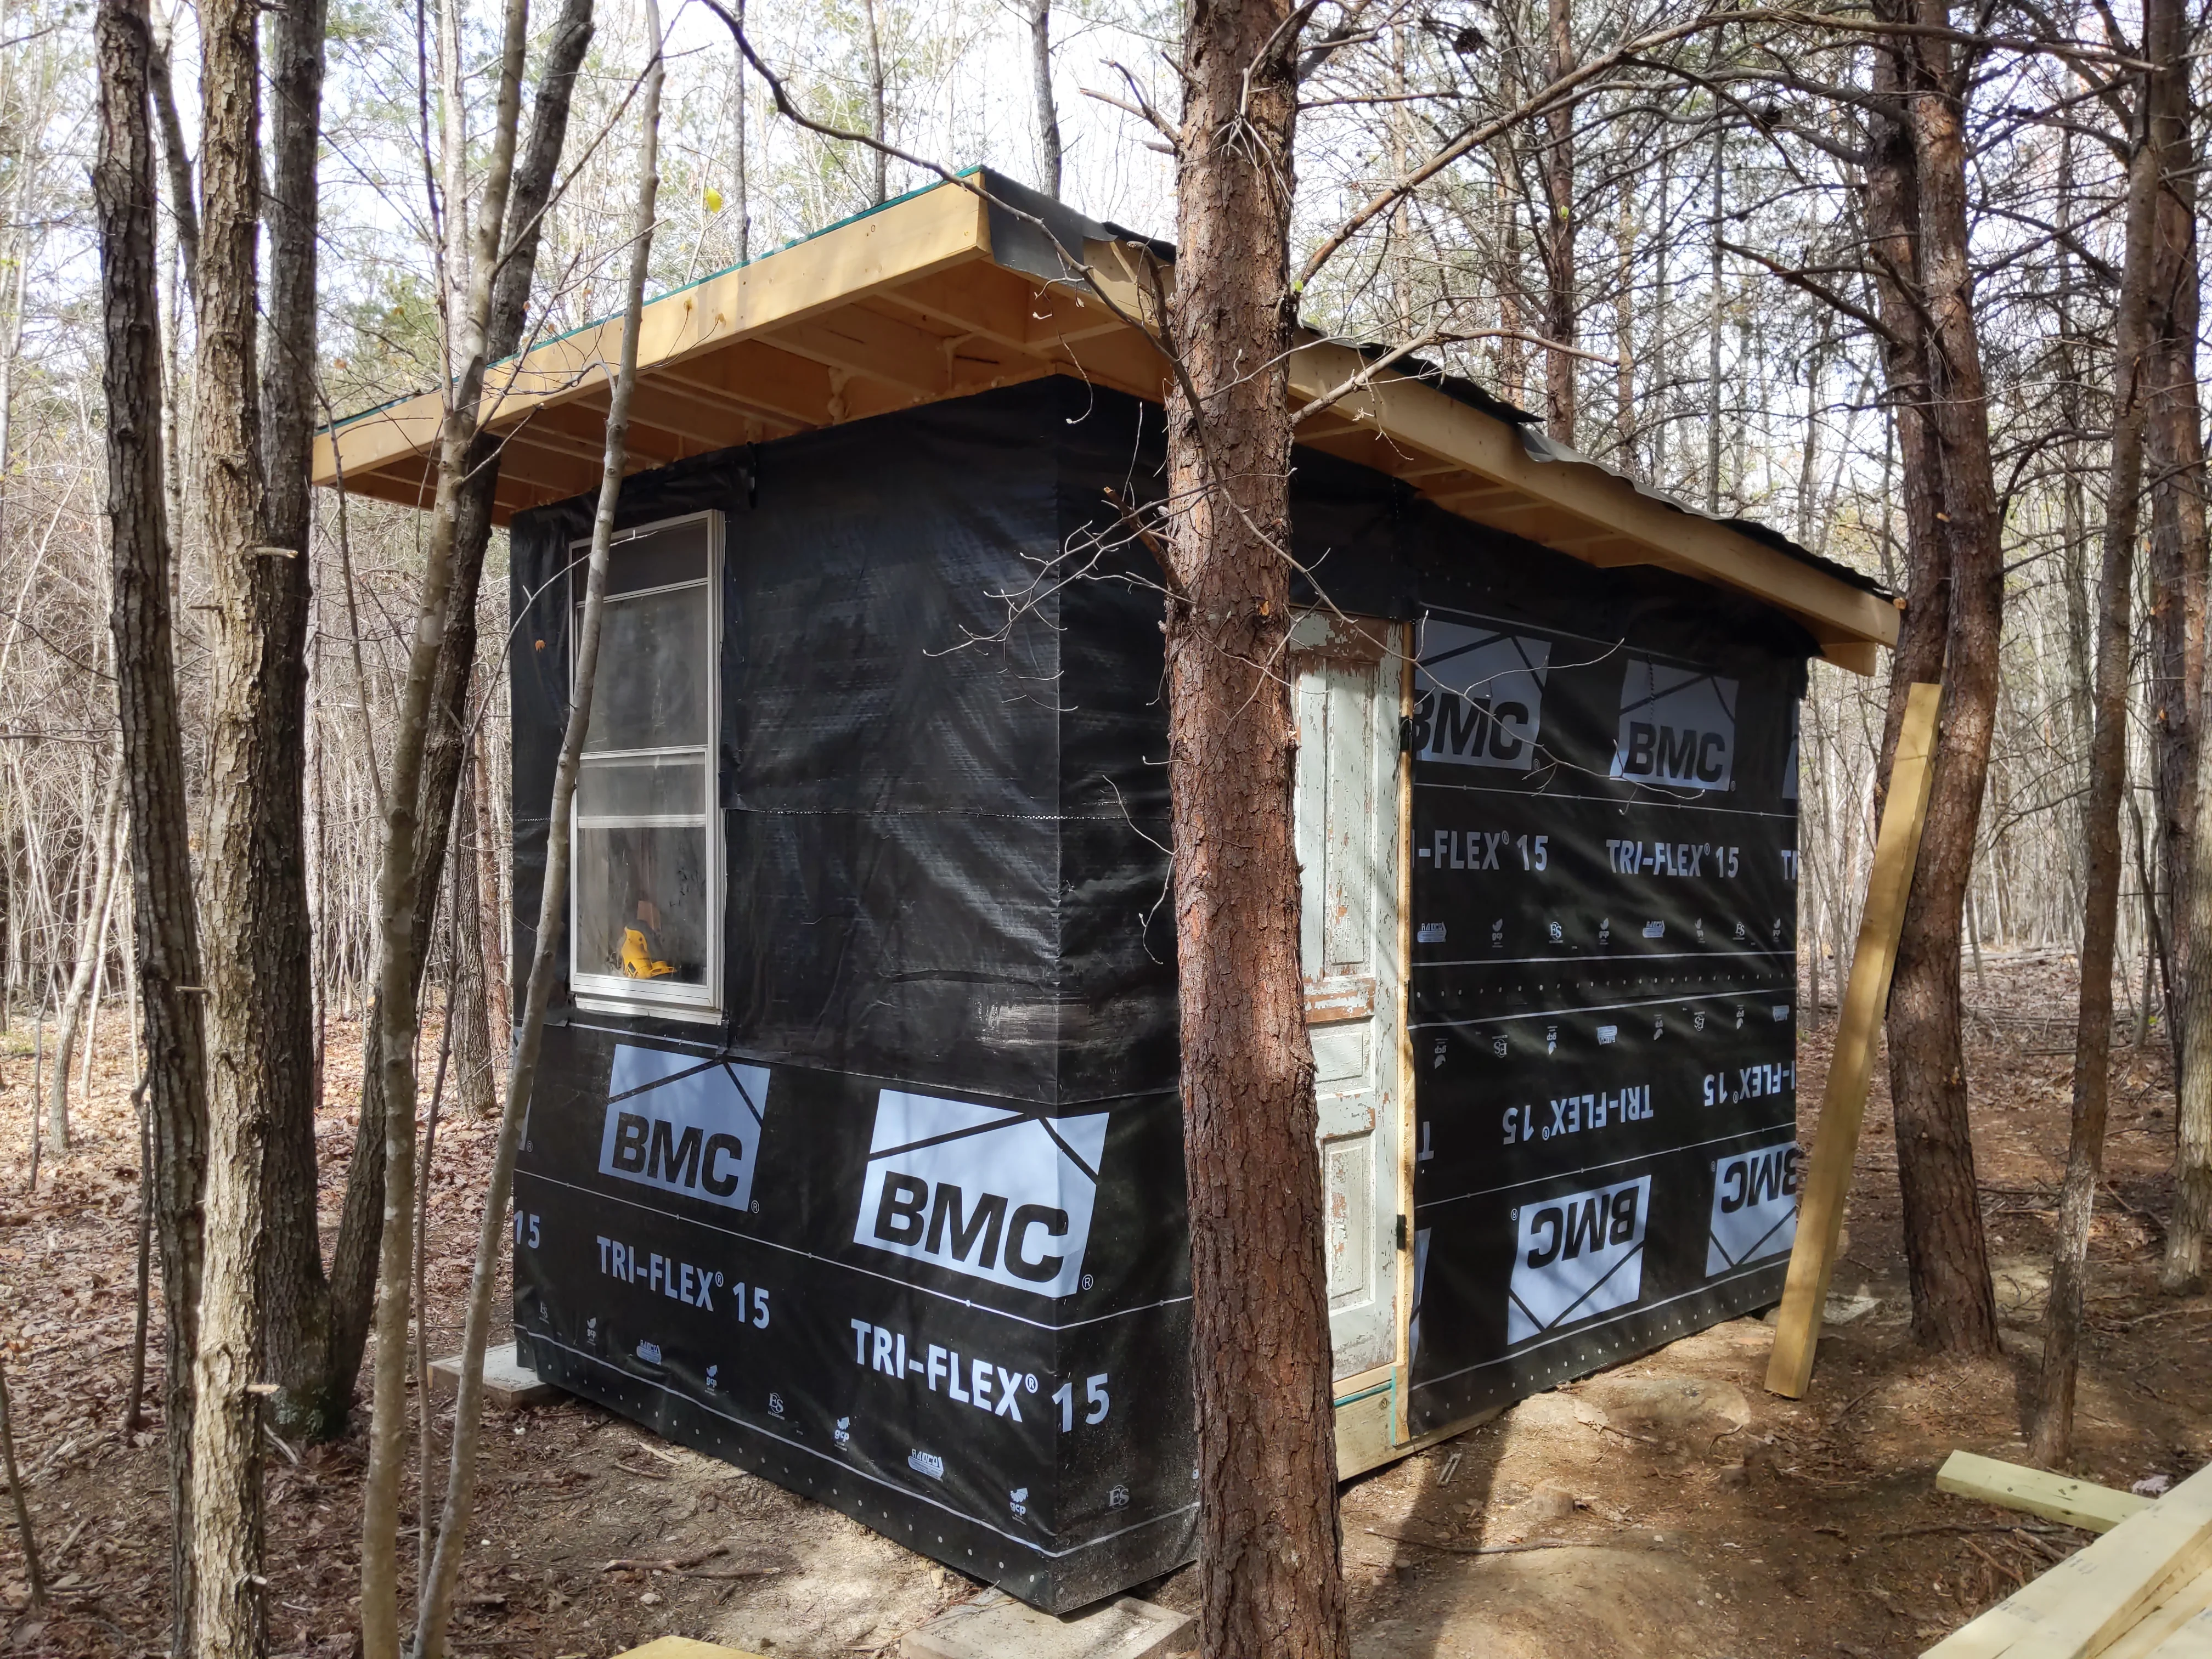
Finally, the outside of the shack was wrapped in housewrap, and cracks were sealed with spray foam. The roof was then covered in tin.
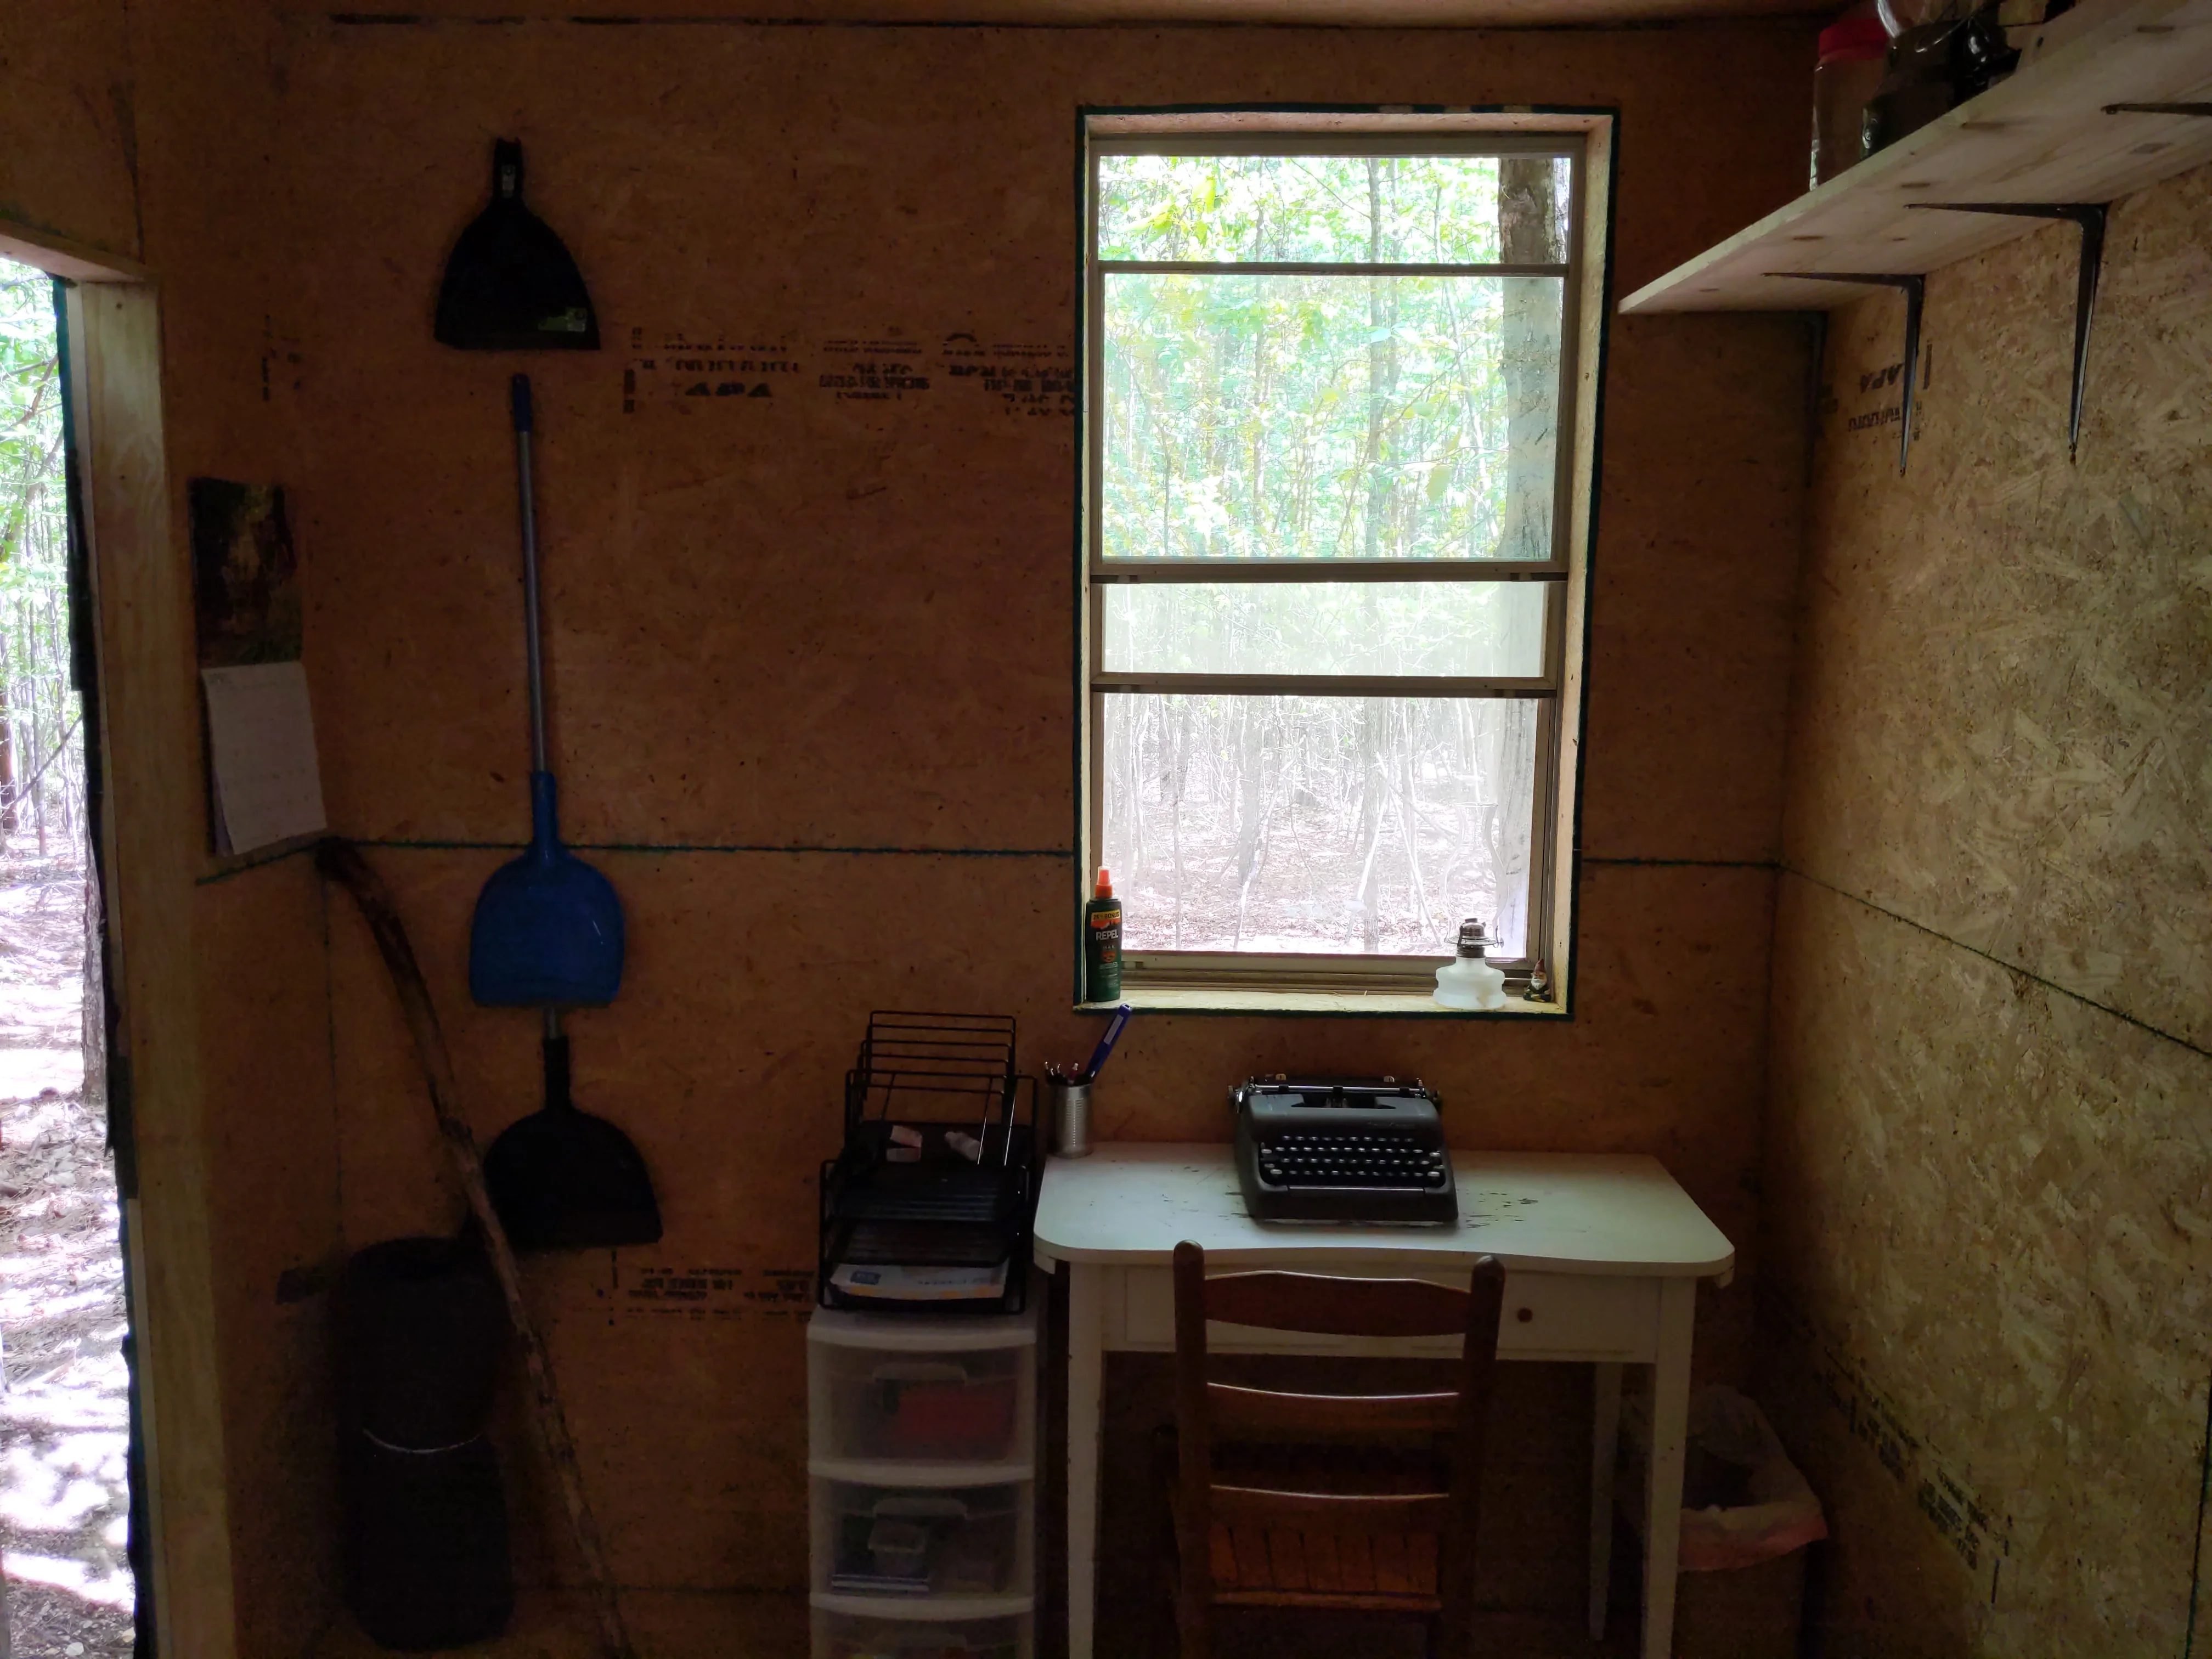
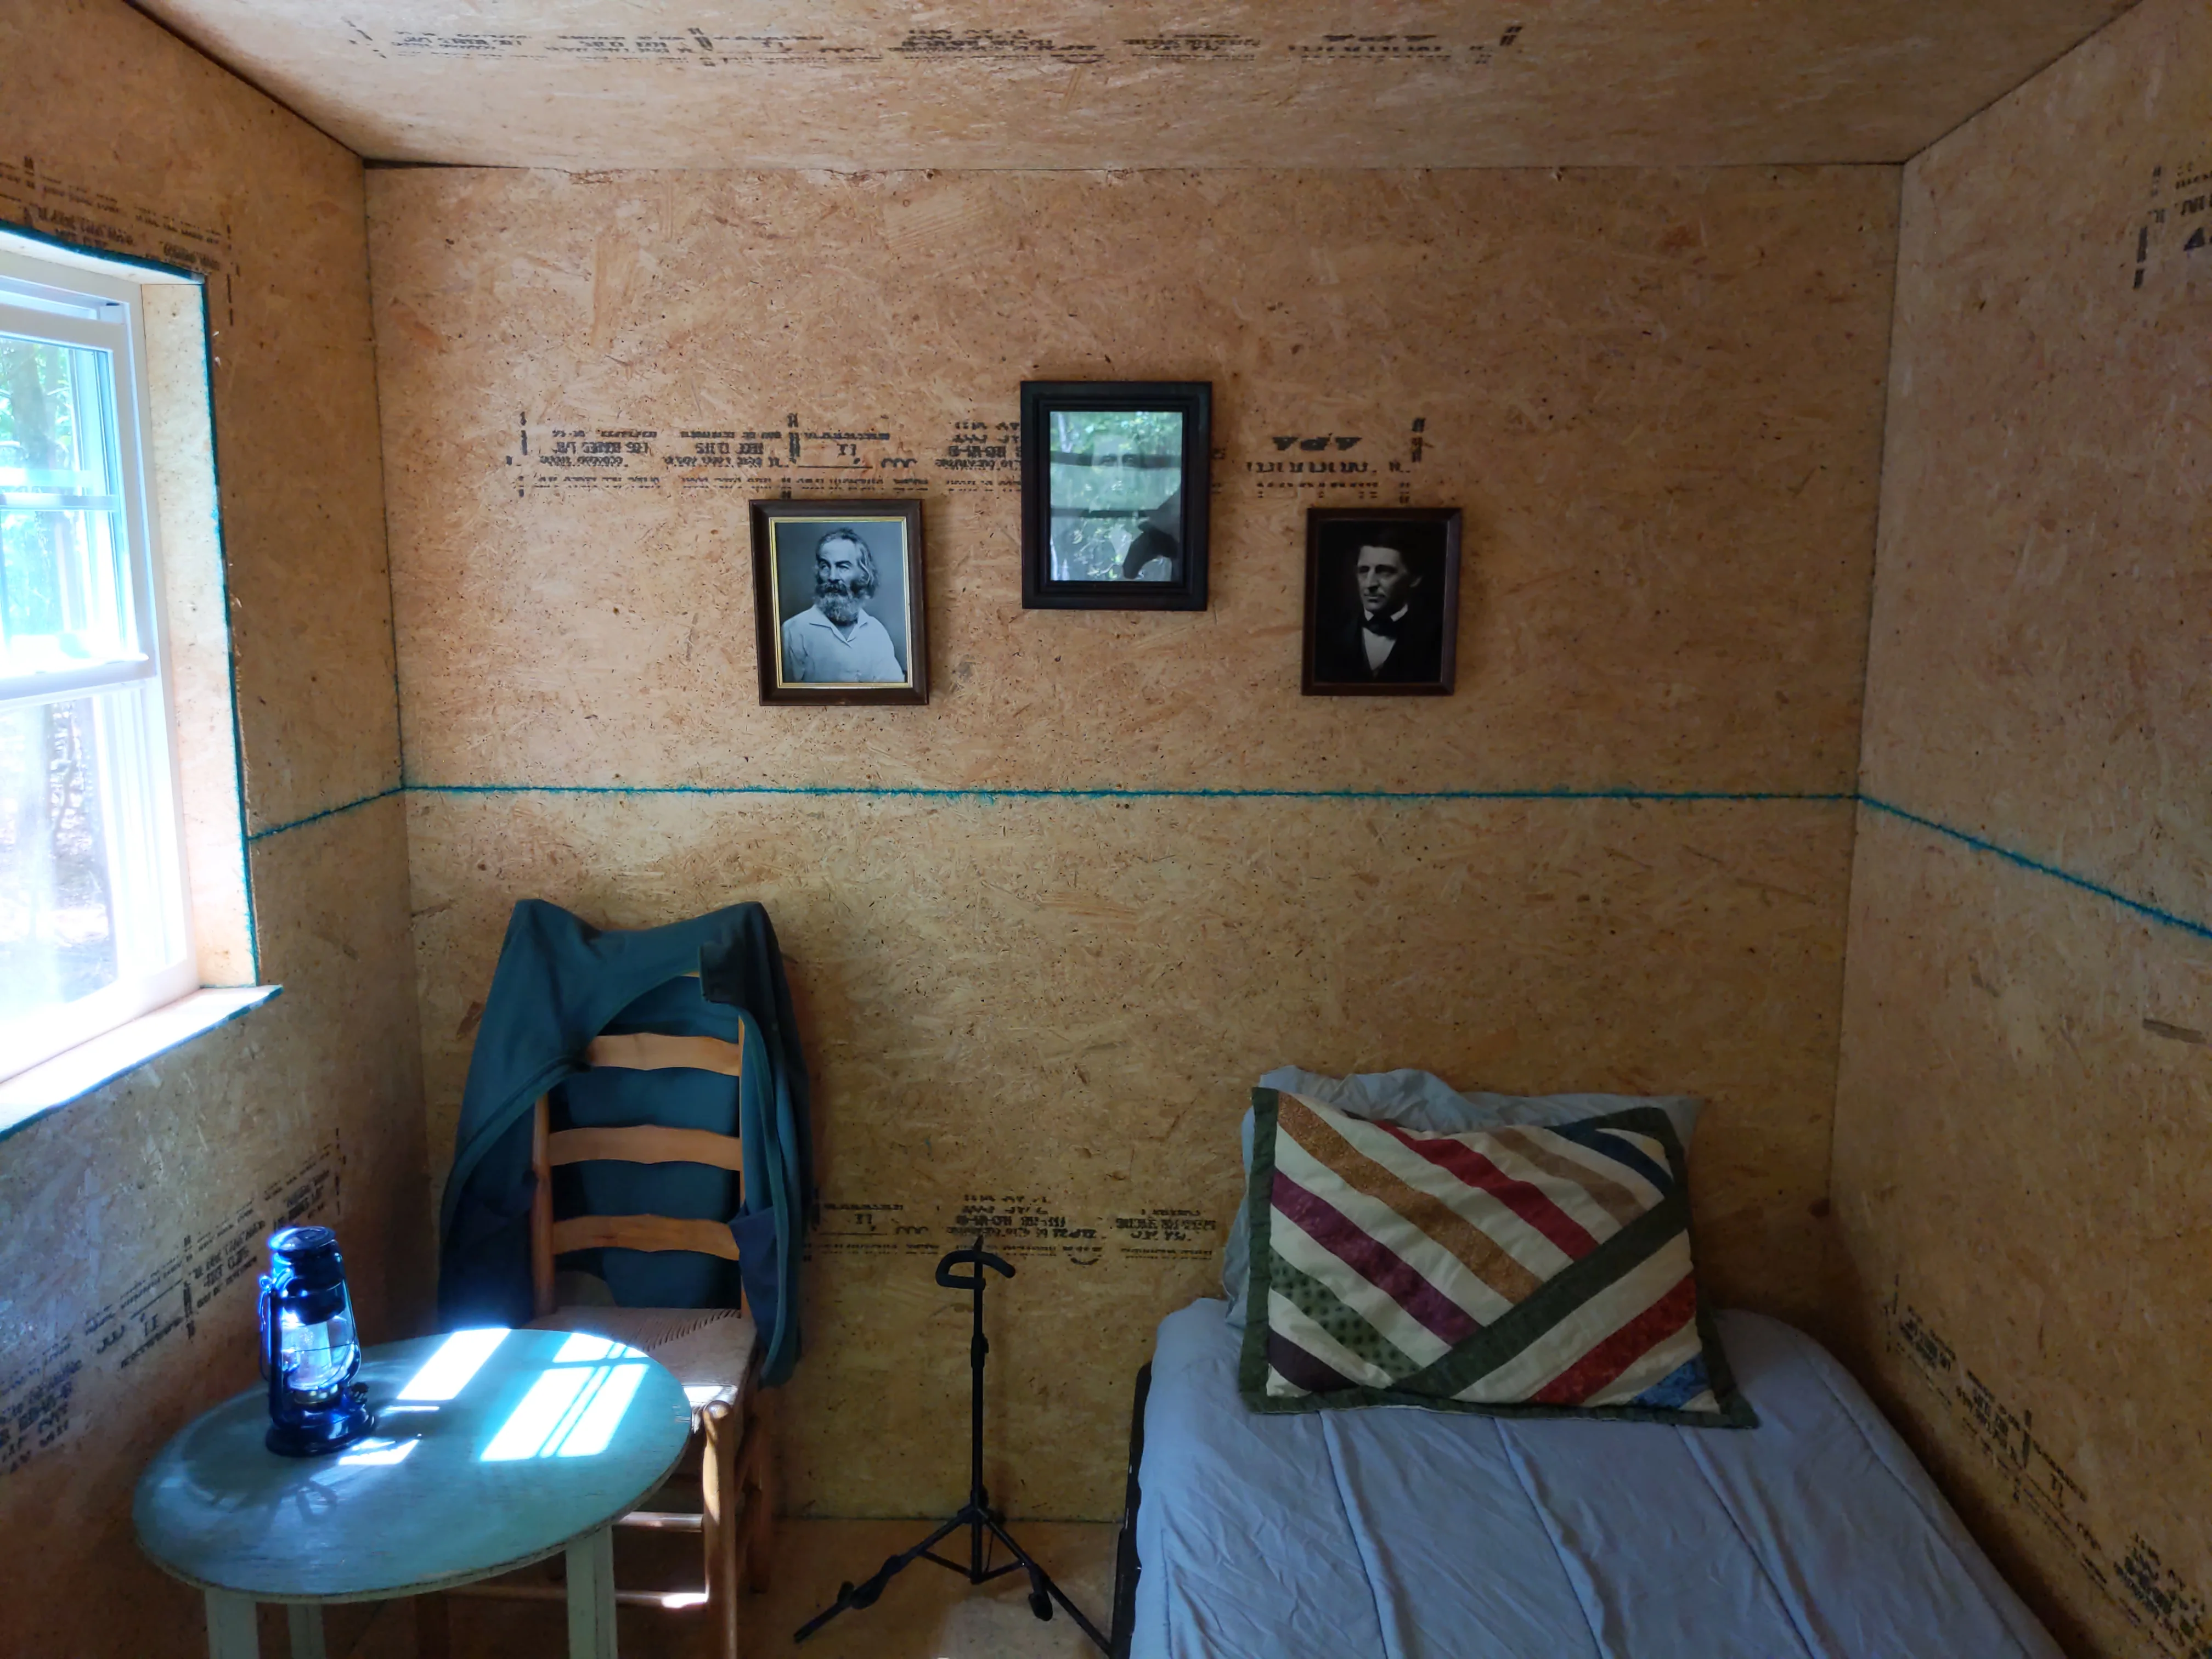
The finishing touches were then added to the inside of the shack. A shelf was put up, pictures were hung, and furniture was moved in.
The Outhouse
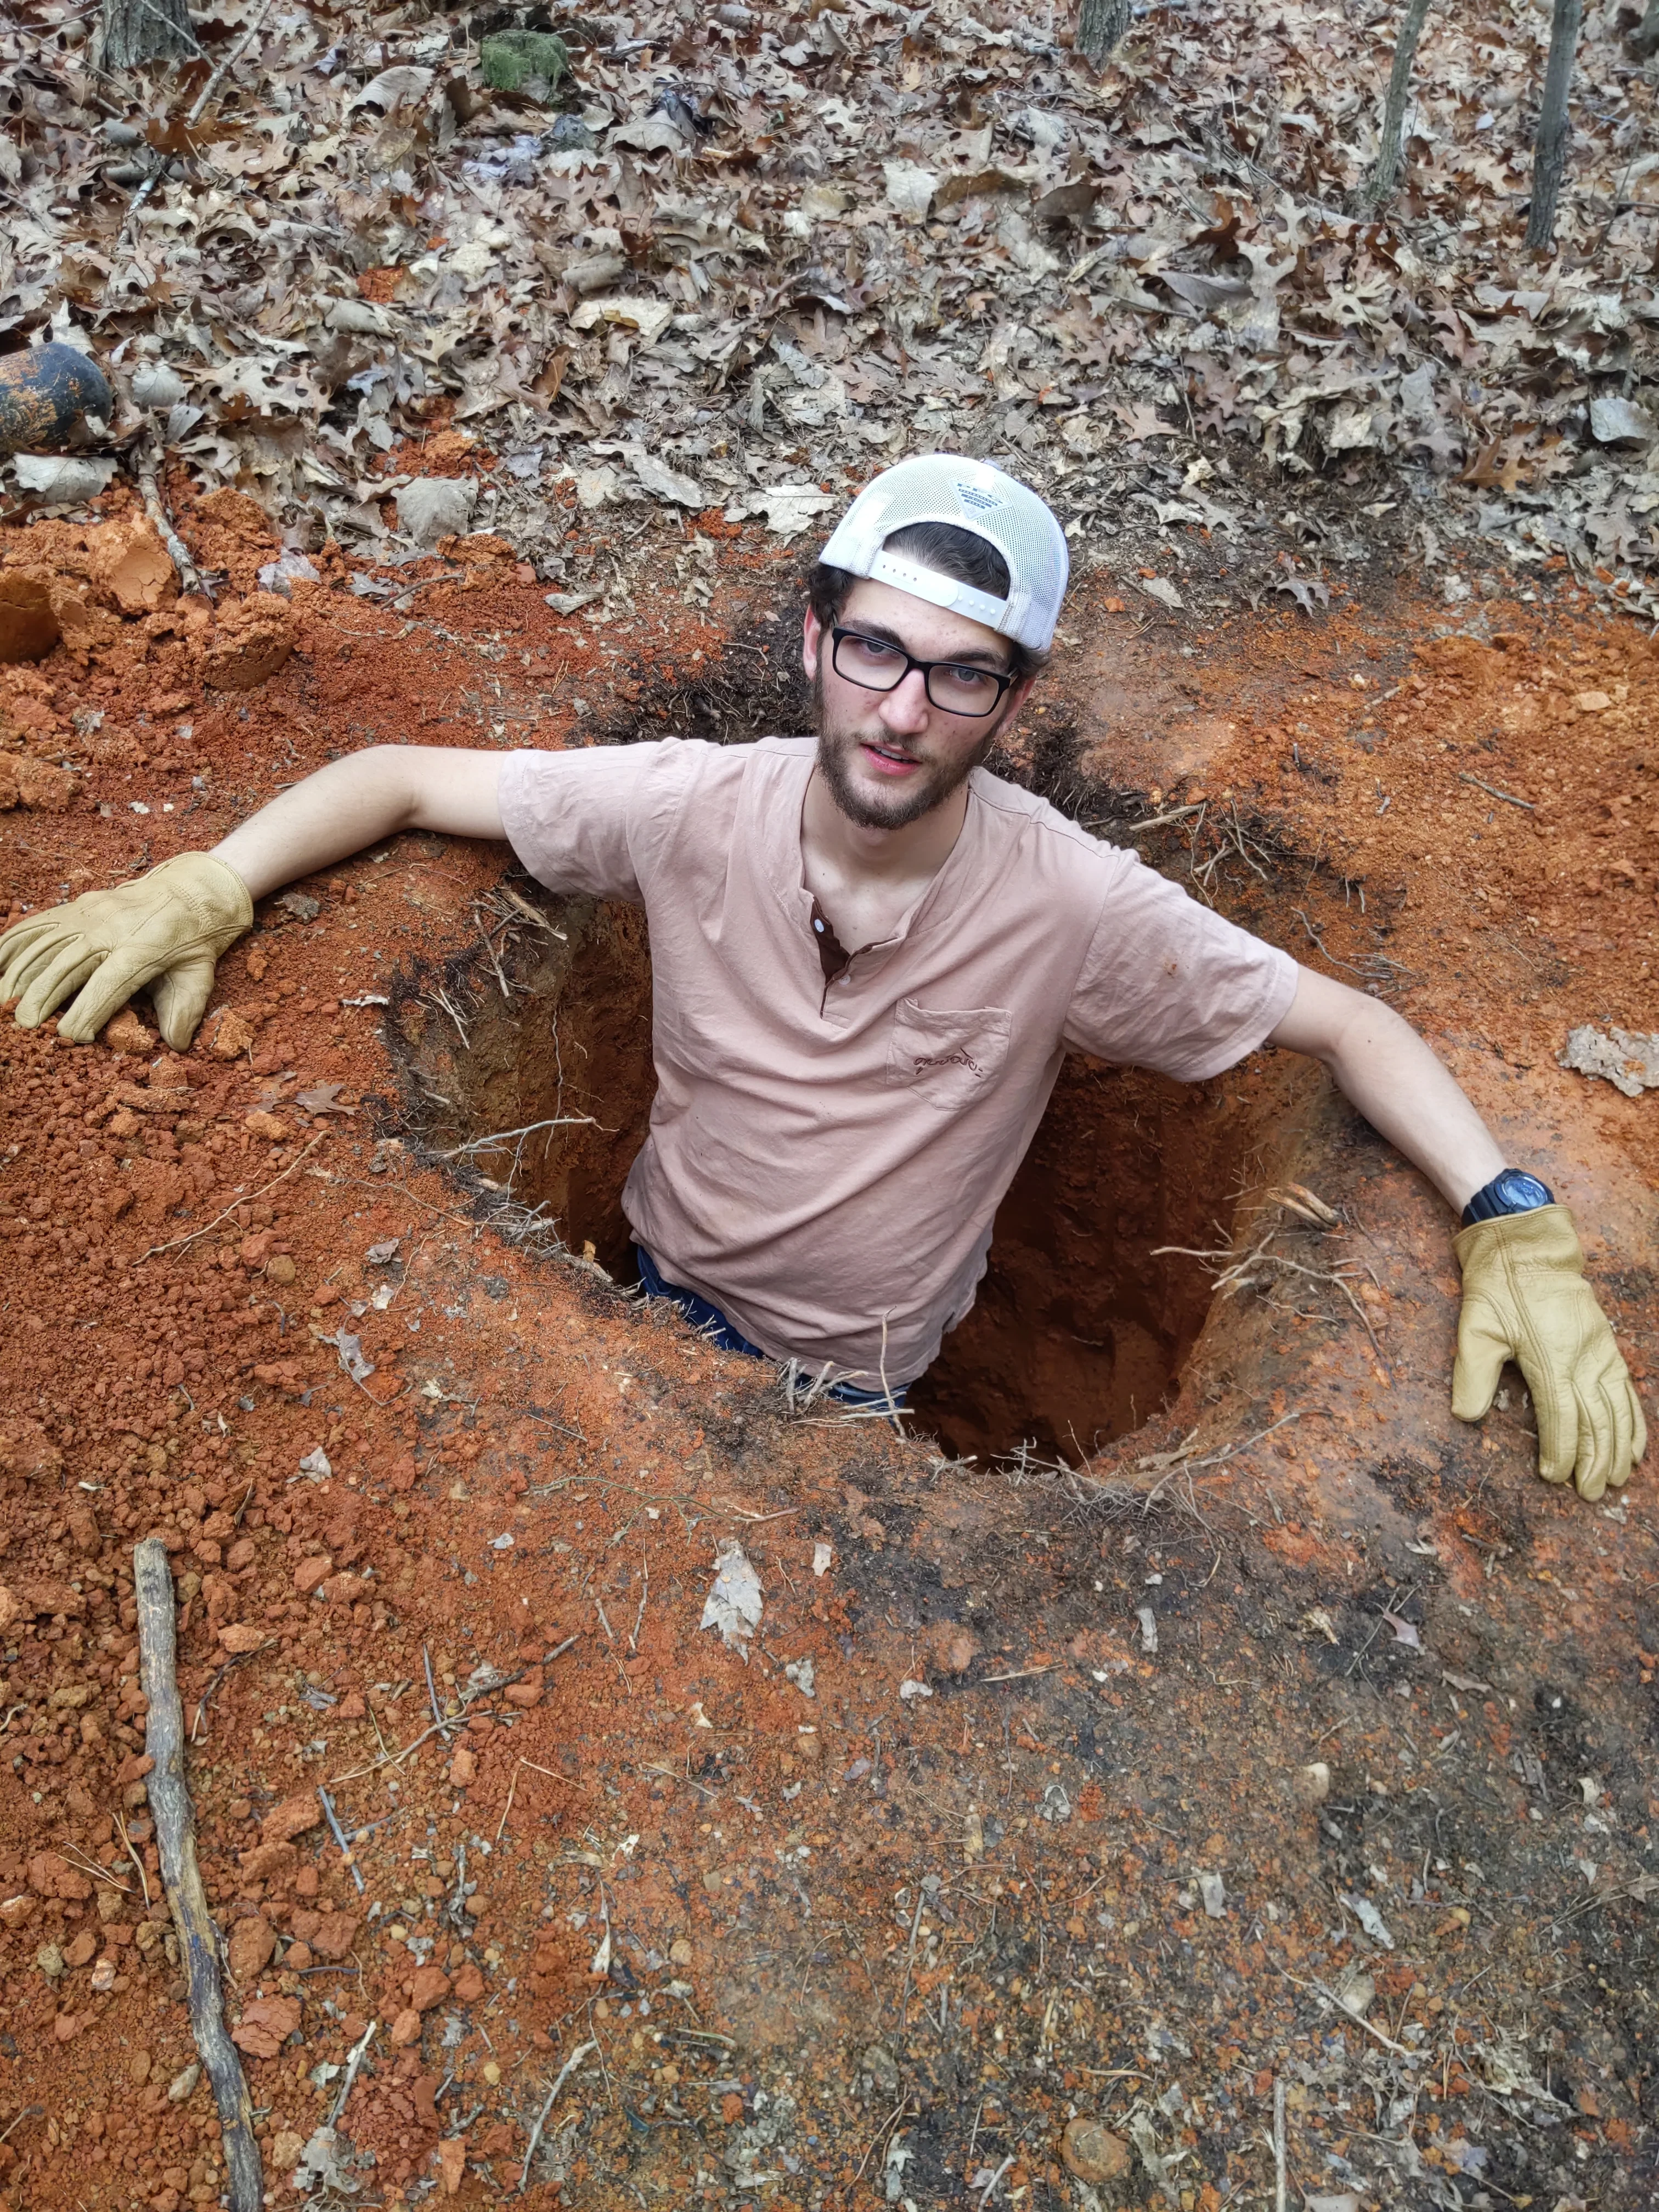
The first (and most laborious) step in constructing my pit latrine was the digging of my privy. In accordance with health guidelines, I had to dig the hole to a minimum depth of 6 feet. Being a man of principles, I mistakenly resolved to forgo modern conveniences (such as gas-powered augers) and resorted to digging a 2-by-2-foot hole by hand. After many long and tiring hours of laboring, I eventually finished excavating all 26 cubic feet of dirt (I ended up making the hole 6.5 feet deep).

After the hole was dug, the next step was to frame the actual johnny house, which was done using a mix of 2x4s, 2x6s, and 4x4s. First, the building itself was framed, and then the toilet seat. The floor, ceiling, and inside walls were made out of plywood. The outside walls and door were constructed out of seventy-year-old wood from my grandfather, and the roof was topped with tin from an old barn.
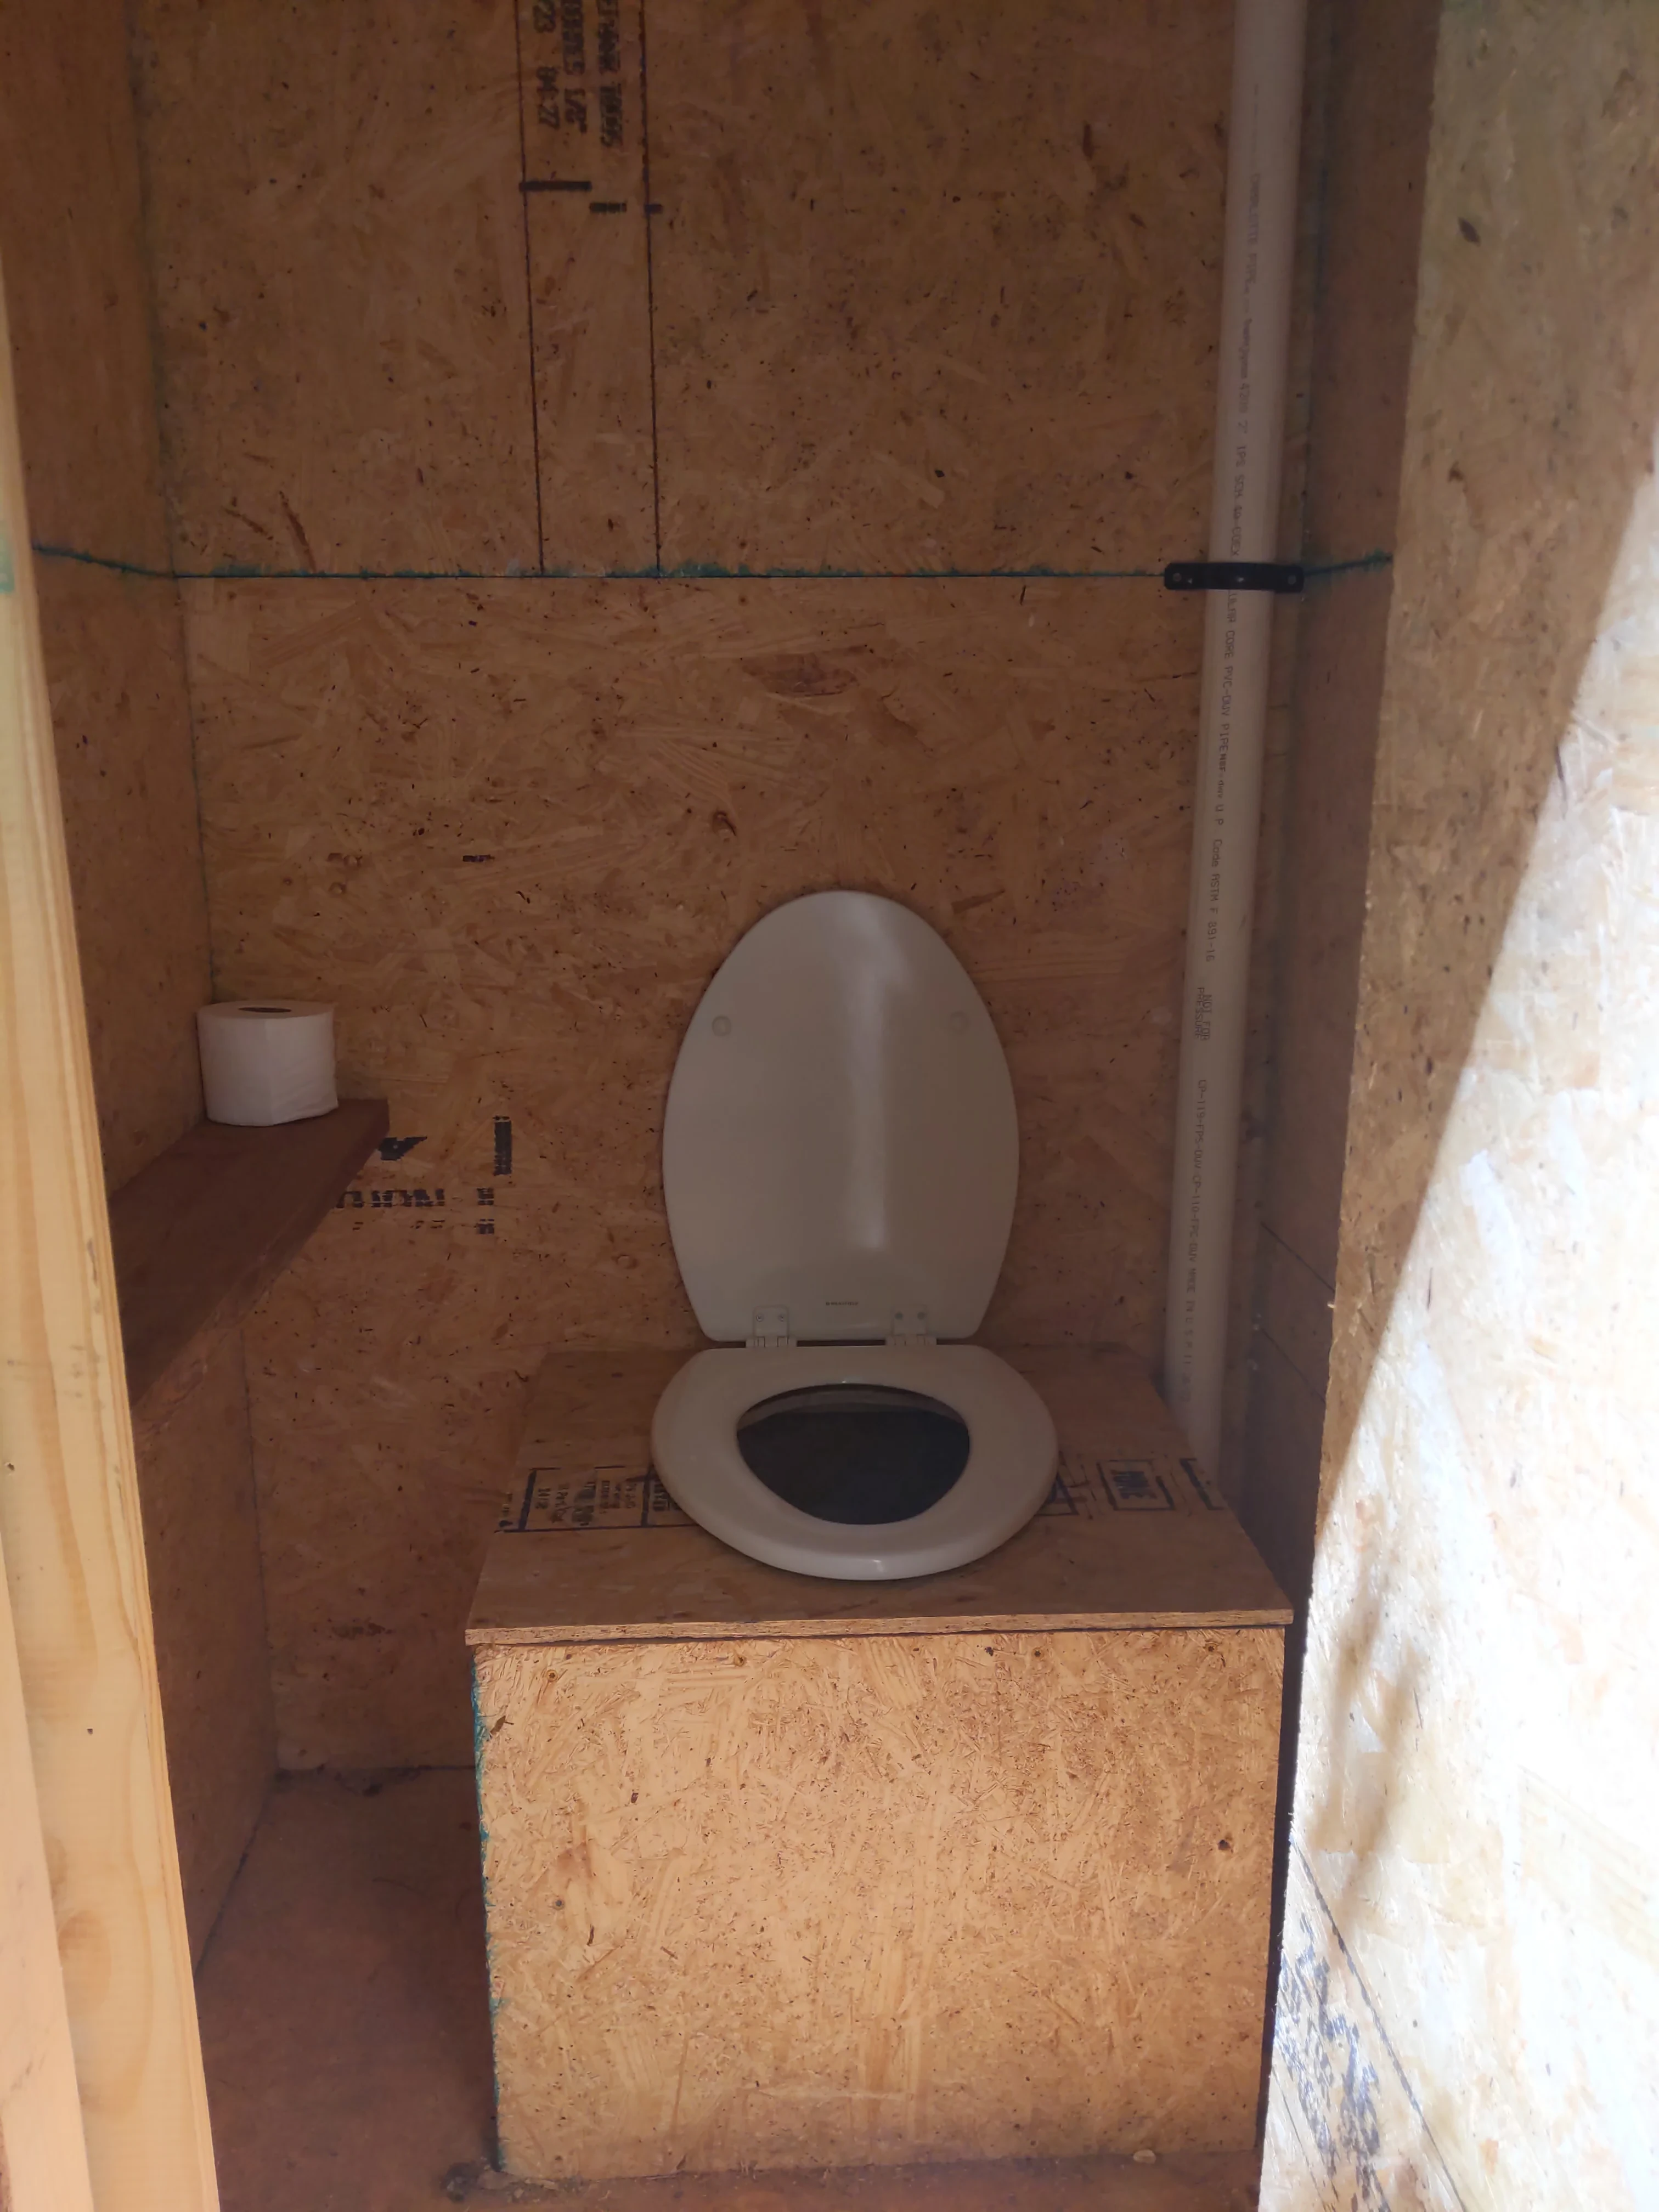
For ventilation, the iconic crescent moon shape was cut into the door, and another hole was cut into the back wall. Both were then covered with screen wire. A PVC pipe was run into the pit and vented out of the roof to provide circulation to the privy. Finally, a toilet seat was installed in the wooded box, and a shelf was hung on the wall. Surprisingly, I think the outhouse turned out nicer than my shack!
The Kitchen
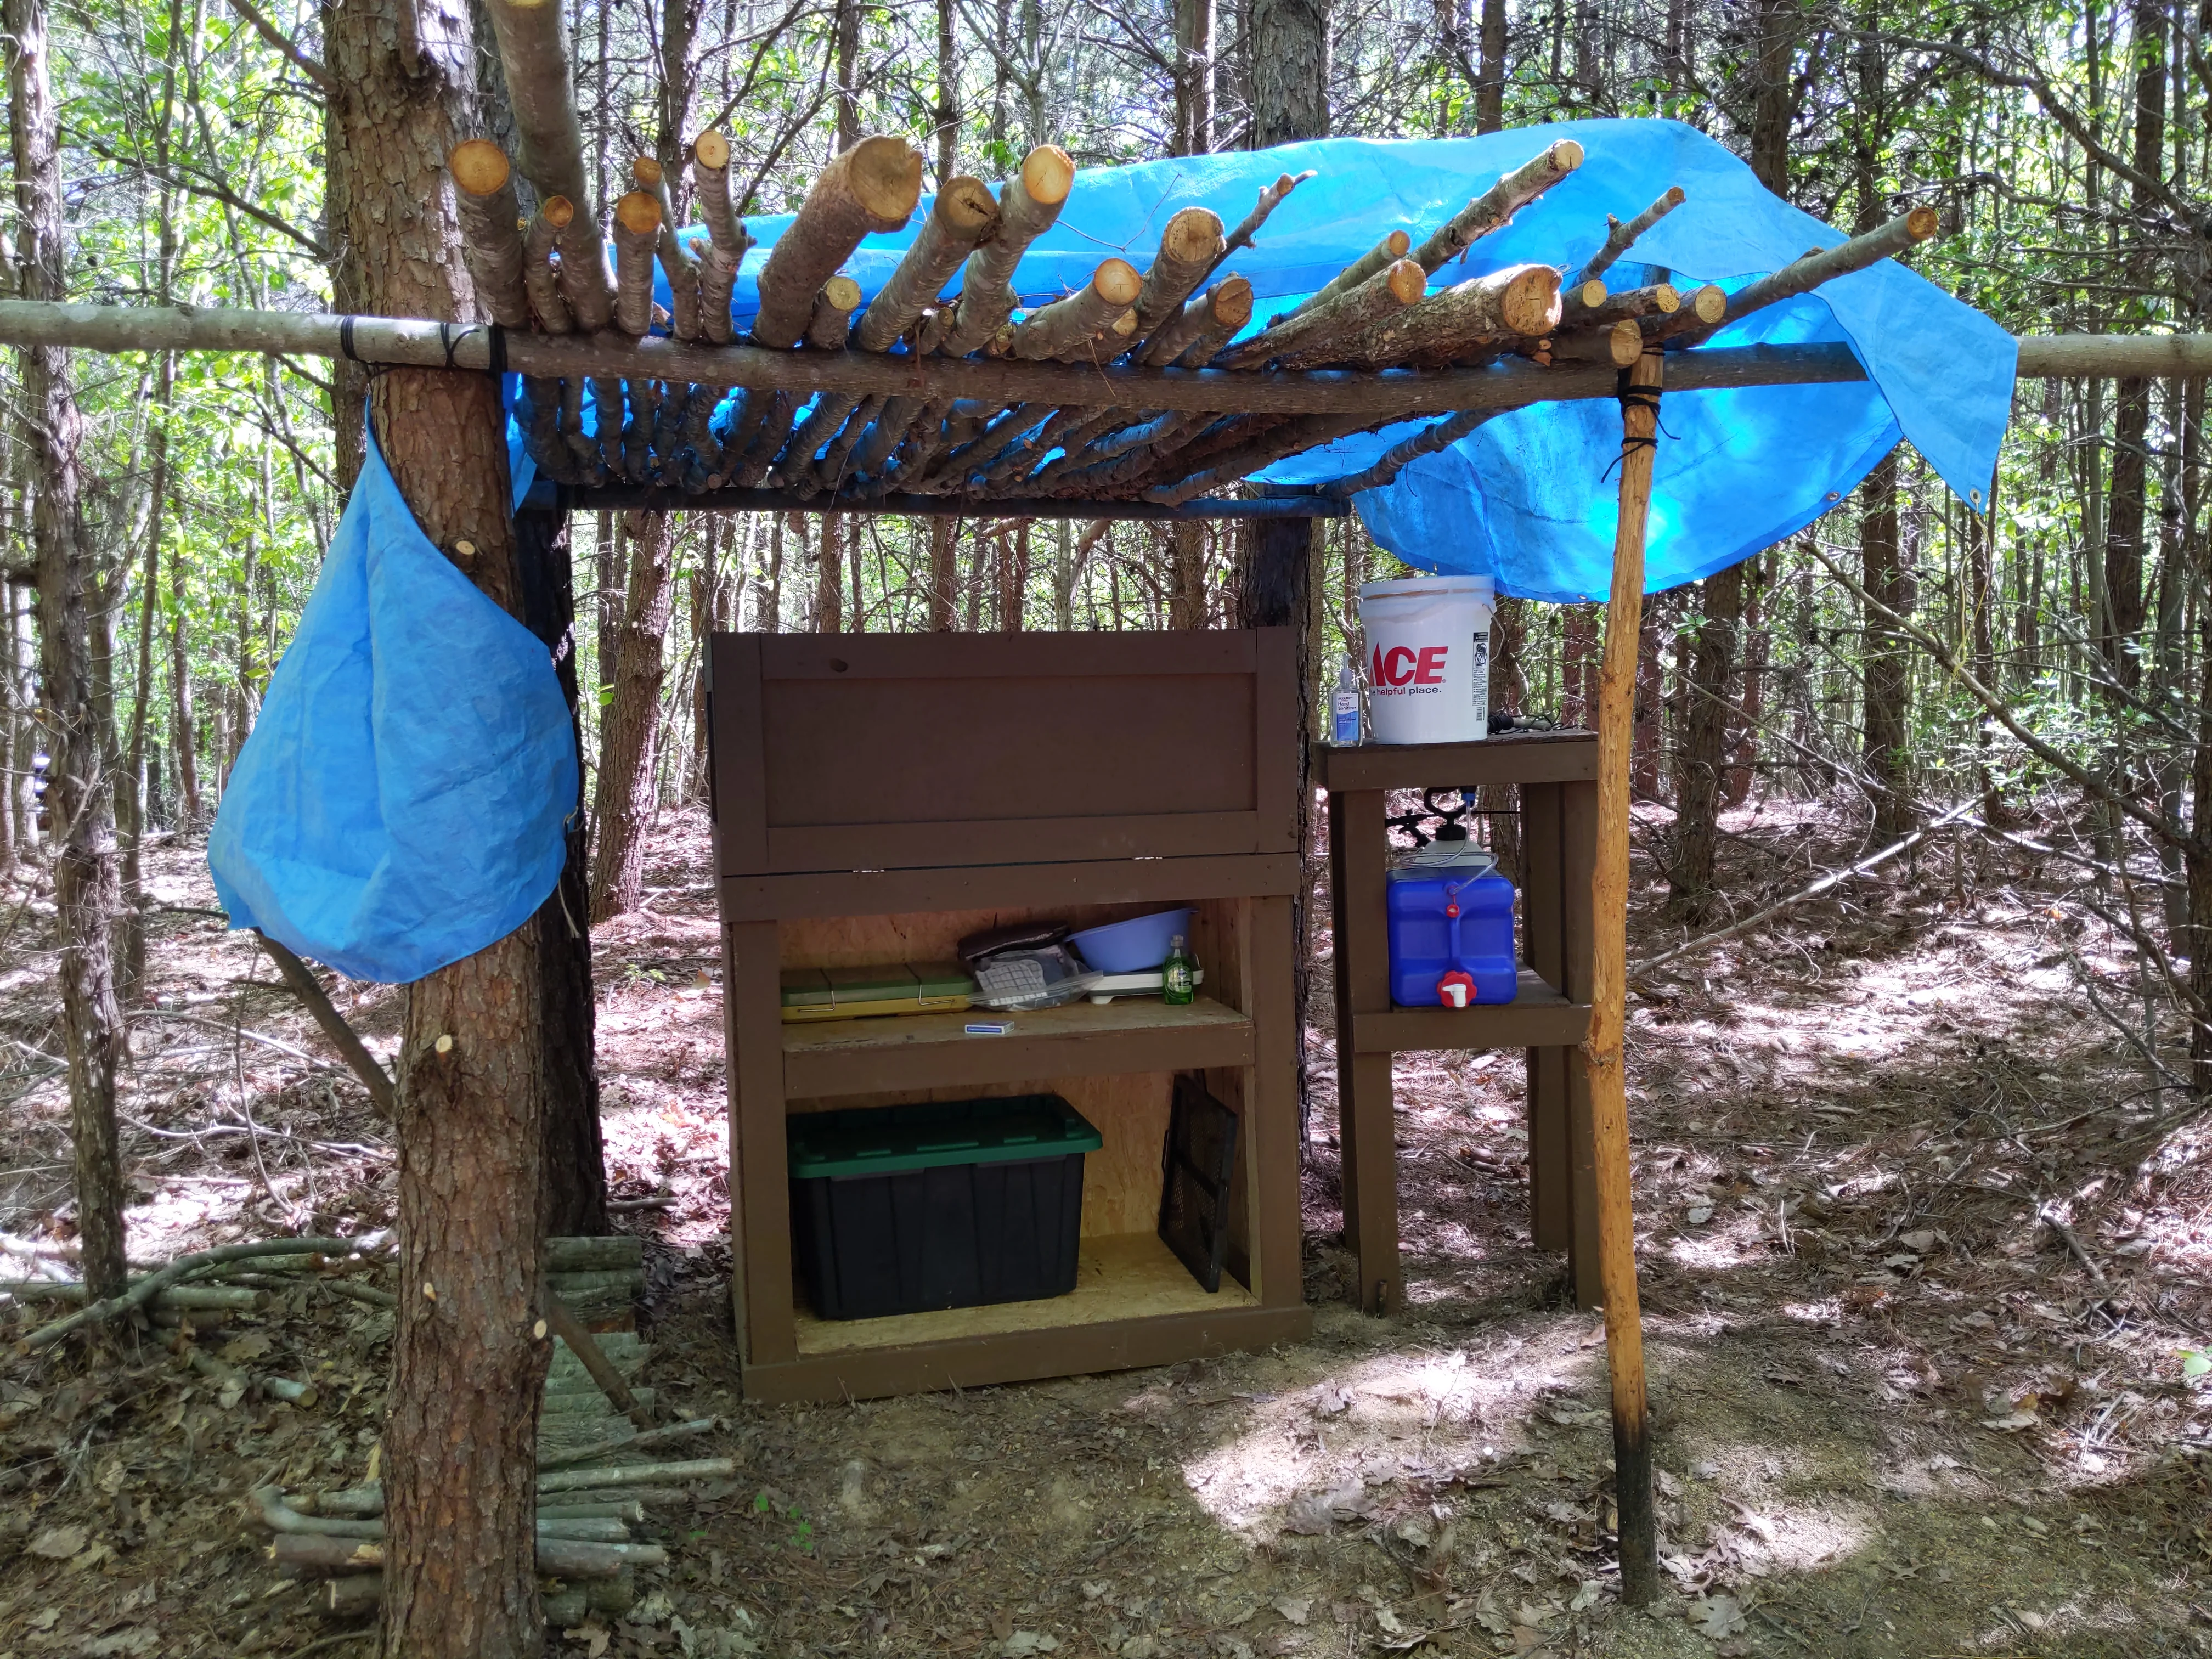
The kitchen (if we’re being generous with that title) consists of multiple components. The first is a large wooden provisions box, which is housed under a shelter constructed from spars and a tarp. This box is where I store my cookware, kitchen supplies, and groceries. Next to the box is my water filtration system. This consists of a Sawyer Squeeze water filter, which is fitted into the bottom of a five-gallon bucket. When dirty water is placed in the top bucket, it gets gravity fed through the filter into a seven-gallon water cooler below, where it is then completely safe to drink.
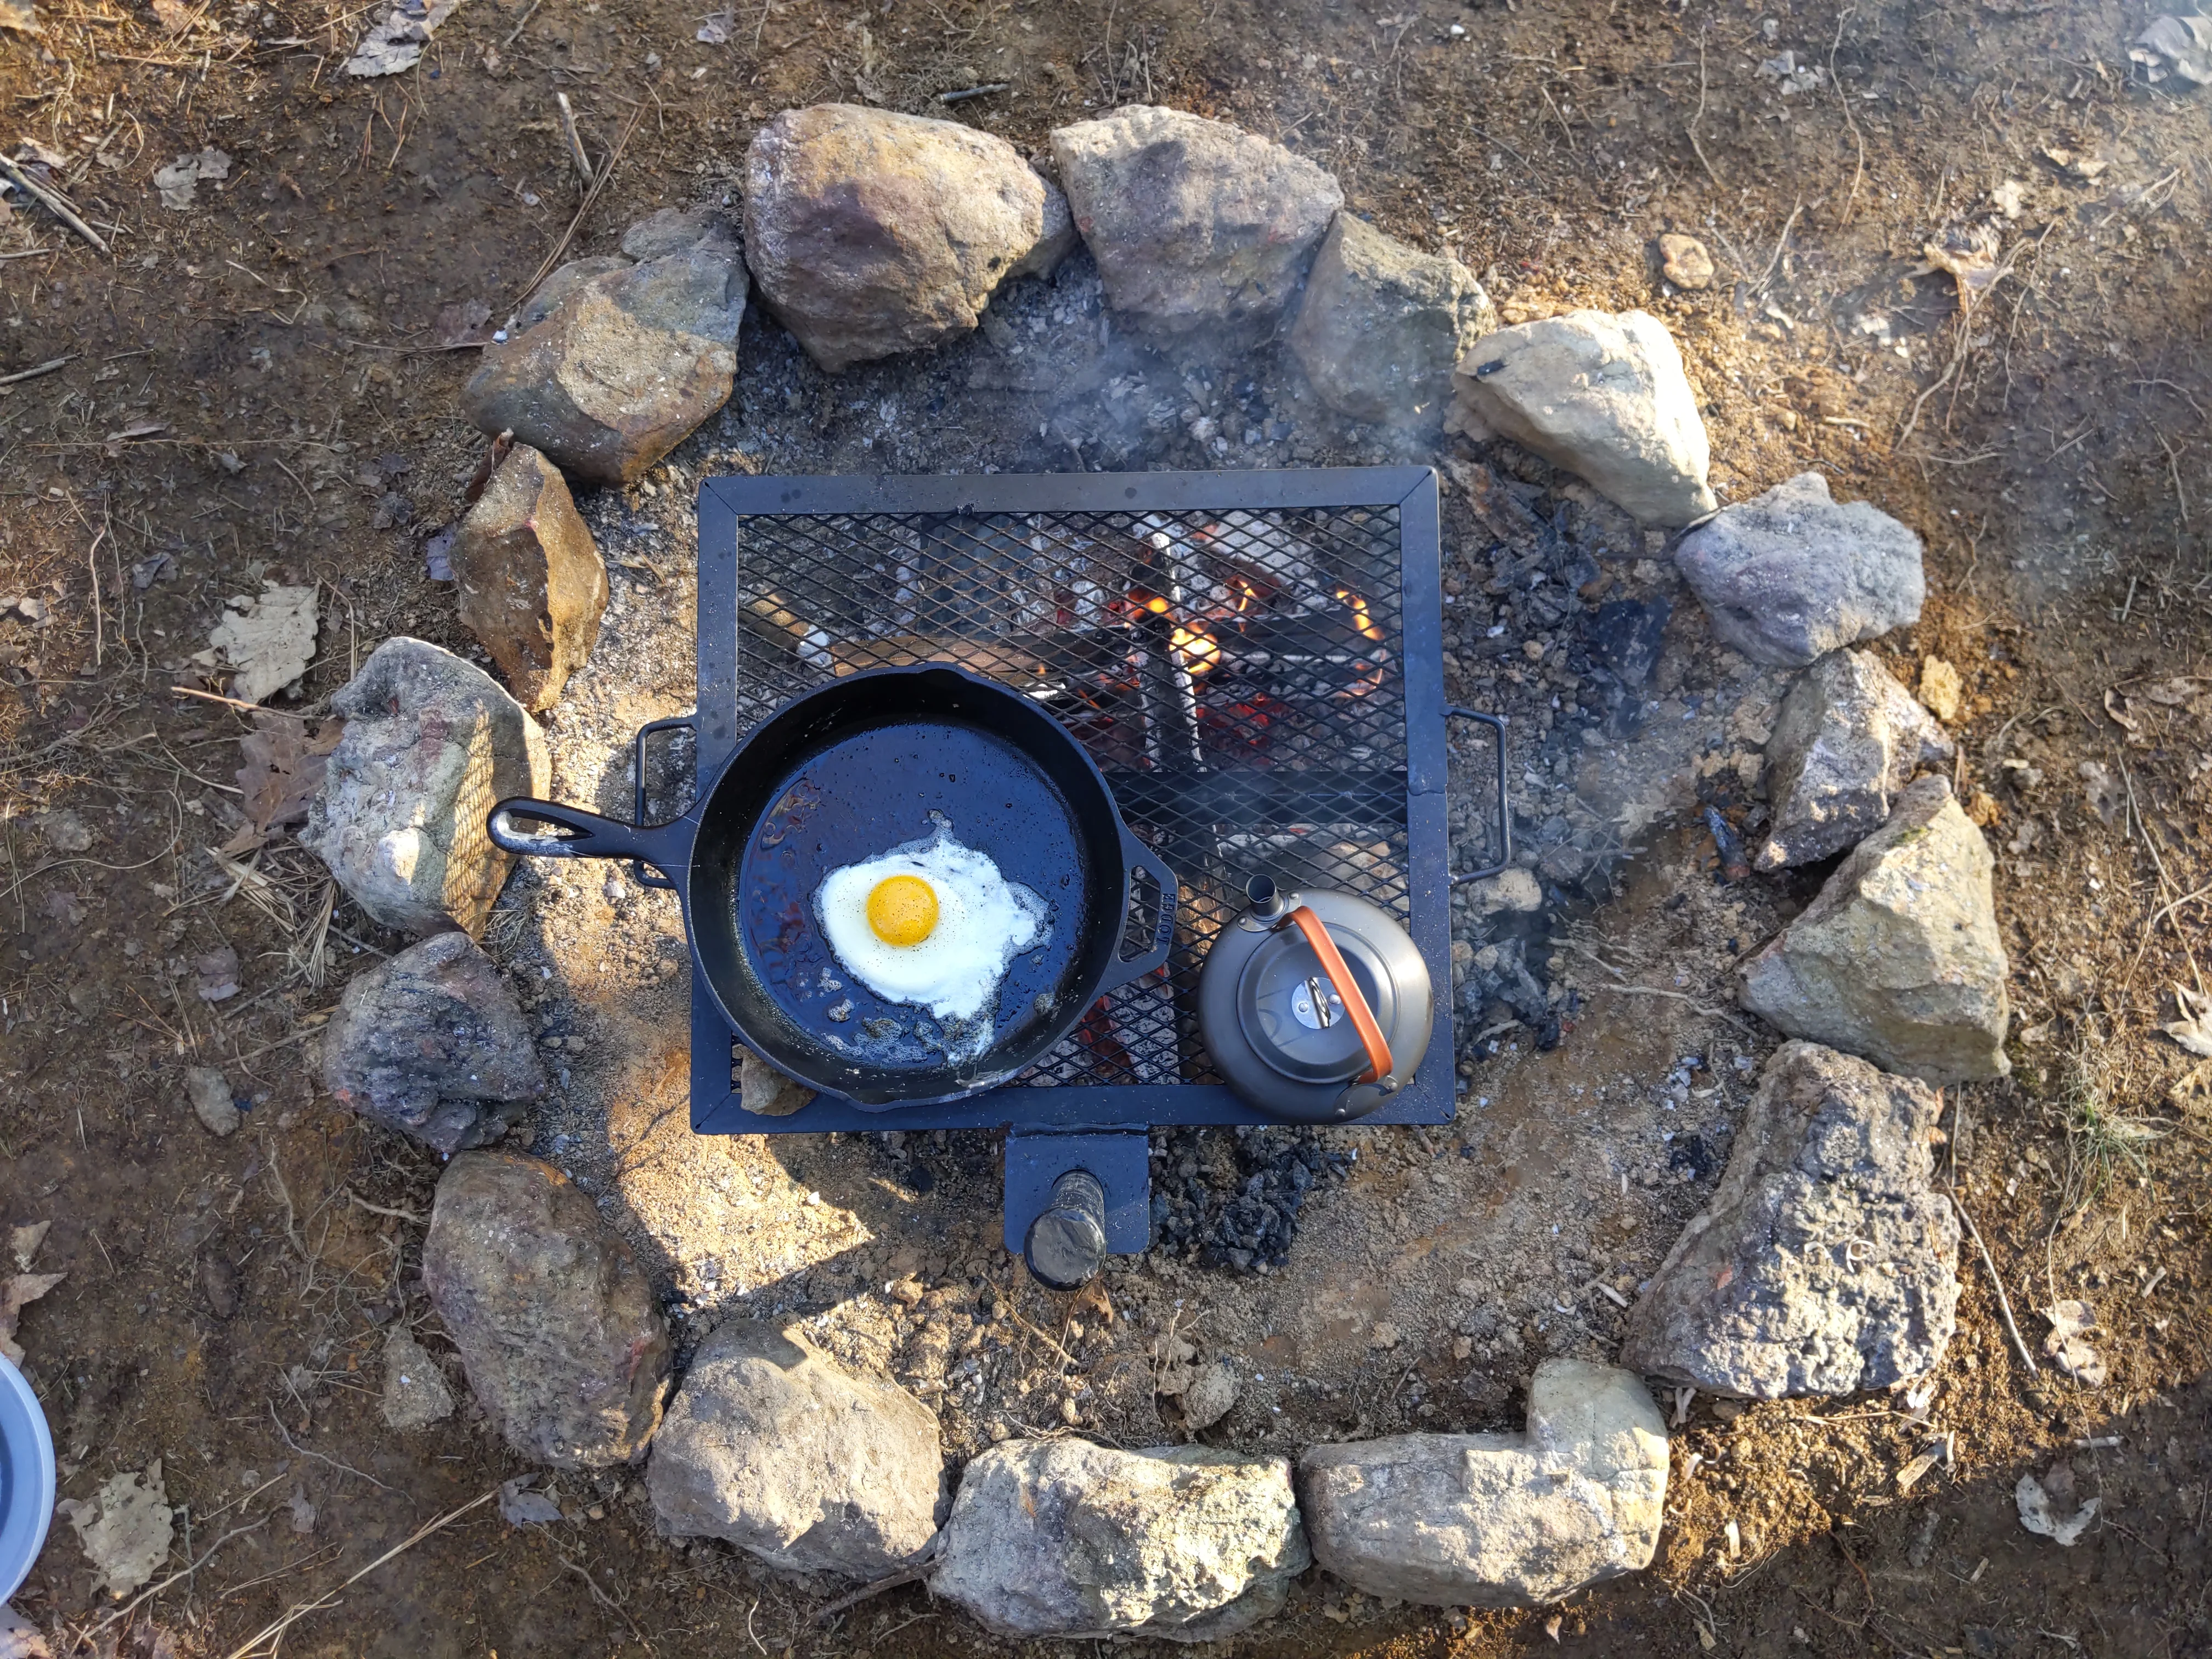
Second, I dug a six-inch pit and constructed a small fire ring. Whether I was roasting potatoes, corn, or some other veggie, cooking over the open fire added a tasty smoke smell and an outdoor novelty to my food. Besides its cooking utility, it’s always nice to have a campfire when you’re in the woods.

Third, I bought a preassembled picnic table, which I covered with a pop-up tent. Here was where most of the action in the kitchen happened. This table was used to prepare and cook food, wash dishes, eat meals, write articles, read, and do anything in between.
The final part of my kitchen is my trash suspension system. To prevent critters from getting into my trash, I threw some paracord through a ridge in a tree, and through the use of some clever knots and tackle, I created a system that allowed me to easily hoist my trash into the air away from any branches.
Reflection
Living in the woods was quite the experience, but so was the construction aspect, too. I had never taken on a project of this size or caliber before, so it was a challenging experience that pushed both my physical endurance (like digging a hole!) and my critical thinking skills (like determining what accommodations were essential).
One lesson that I learned is that regardless of how good an idea may sound, sometimes it’s best to just stick to the plan. During the entire process, I would randomly get a new idea and change some aspect of the build, which increased both the total construction time and caused me to go over budget. It worked out in the end, but next time I pursue something like this, I’m going to spend more time in the beginning thinking about what I actually want and then trying my best to stick to my plan.
Lastly, it would be remiss of me not to thank my father, Chris, for all his help in this adventure. Without his guidance, I would’ve been sleeping under a couple of sticks instead of in a classy and sturdy hermitage. From helping me create a material list to brainstorming solutions to weird problems, he was an invaluable resource in this progress and deserves the credit.
That’s about all I have for construction. Be on the lookout for future articles about my expedition in the woods, and if you can, go out and enjoy the wonders of the natural world.
Enjoyed the post? The best way you can show your support is by sharing the article and liking and commenting below.
comments powered by Disqus